Monday, 26 April 2010

The weakness of integral parchment seal tags

Just having talked about integral parchment seal tags, it's worth I think talking about how they were easily damaged, and a few ways medeival scribes attempted to prevent this. As before, click on an image to see it full size, and the links in the text to find out more about the doccument. A number of these examples are from the excellent durham archives site, please note that you need to enable popups for the site if you wish to see transciptions of the text.

This post is for lots of examples of integral seal tags that have torn off, because the shape of the doccument and often where the seal had been can be seen (Again, order is roughly chronological). Next post I'll show a few exmples of attempts to repair or prevent this.


Writ of Henry II threatening consequences if Cecilia de Muschamps and Thomas because they didn't give Heatherslaw back to the Durham monks.
1154-1173
(Durham Cathedral Manuscript, 3.1.Reg.2)

This follows on from an earlier writ telling her to do so which will be shown in the next post. I find it interesting this is adressed to a women of power, presumably as regent for her son.


Writ of William II regarding Lincoln
After whitsunday, 1072
Tag: Seal tag has torn off
Wrapping: A thin tie survives. 3 vertical and 4 horizontal folds are visible.
(Lincoln D & library AI/I/I)


Writ of William II
Brigstock, 1095
Manuscript: In Latin
Tag:
Partly torn off.
Wrapping: partly torn off. 3 vertical and one horizontal folds.
(P.R.O. Duchy of Lancaster, Royal charters DL.10)


Writ of William II, regarding the bishop of Thetford & Norwich
Ceagewella 1095
Manuscript: In old English.
Tag: lost, looks like cut off to remove seal (by an early modern seal collecter perhaps?)
Wrapping: Part of wrapping tie remains.
(Norwich, D & C. Library)


Writ of William II, regarding Norwich Holy Trinity Church
Westminster 1096
Manuscript: In old English.
Tag: remains of seal tie visible, seal lost.
Wrapping: No renmains of a wrapping tie visible, but could have been removed. 3 vertical and 1 horizontal fold reported.
probably not drafted by te royal scriptorium - less use of formulaic phrases
(Norwich, D & C. Library)


Writ regarding Christ Church, Canterbury
Brampton, 1 May 1099
Tags: part of seal tag and wrapping tie remain
Folding: 3 vertical and 1 horiz fold
(Canterbury D & C Library Ch. Ant. C. 6)


Writ as title deed for Holy Trinity Church, Fecamp
Lillebonne, 1099 July-September
Tag: torn off.
Wrapping: Tie torn off. 3 vertical and 2 horizontal folds.
(Rouen, Archives Departmentales de la Seine-Maritime 7 H.12)


"letter patent of King John in favour of Robert earl of Leicester."
13thC


Doccument
Sweden, 1374-5
(Swedish National Archives DS8783)


Surrender at the Courts Baron of the Manor of Ersham Dubbells
Norfolk, Friday in the Vigil of Saint Luke the Evangelist, 1550
Manuscript: vellum, 100x250 mm.
(Griffin Manuscripts sale catalogue Number 23399)


Surrender at the Courts Baron of the Manor of Ersham Dubbells
Norfolk, Tuesday 14th May 1560
Manuscript: vellum, 85x295 mm.
(Griffin Manuscripts sale catalogue Number 23398)


Surrender at the Courts, Baron of the Manor of Ersham Dubbells of half an acre of land called Redfild Pightell
Norfolk, 1568
Manuscript: vellum, 280x80 mm, written in a typical Tudor scribal hand.
(Griffin Manuscripts sale catalogue Number 23387)

Indenture deeding a parcel of land in Morytton, England from Thomas Ladde to Robert Beane.
September 10, 1575
Manuscript: vellum, 105 x 265 mm, contains 10-lines of Latin script penned in a gothic cursive.
(Griffin Manuscripts sale catalogue Number 24104)

Surrender at the Courts Baron of the Manor of Ersham Dubbells of four pieces of meadow in Northmedowe in Ersham and two pieces in Prestes medowe
Norfolk, Sunday 4th November 1576
Manuscript: vellum, 150x310 mm
(Griffin Manuscripts sale catalogue Number 23393)

The surrenders are really transfers of property, but under the feudal system the baron has to approve of the transaction, even if it's a son inheriting.


There are many many more examples of broken off integral seal tags. Almost as many doccuments exist in archives today without their tags as with them, especially in this fragile style.

Tuesday, 6 April 2010

Suthmoot links list

Hi,

Those of you who spent easter with me at Suthmoot may have had the 'pleasure' of me ranting about a favourite topic either in a class, or informally. And I probably said you could find out more about the topic on my blog. And now perhaps you're looking at my blog wondering where to go next? Look perplexed no longer, here's a list of links and status updates:


happy crafting...

Wednesday, 17 March 2010

Closed letters and closed writs

In the last post, you might have noticed mentions of "ties" or even seen that some examples have what appears to be a second seal tag. The example below is a fine example from the 11th Century.


Writ of William II
1095, King's Cliffe
Seal: Great Seal in white wax
Wrapping: Tie remains. 3 vertical and 1 horizontal fold
(Burgley House)


Below the text, the parchment is slit into two narrow tounges, one holds the seal and the other is used to tie the doccument closed. It's generally called in the literature by the highly technical term of "a tie". You can see many of the standard features exhibited by 11th C wrapping ties here - the tie is long (the width of the document) and narrow, even if the seal tag is wider. The tie is located lower on the parchment thatn the seal tag. The folds in the parchment probably date from when it was created, the doccument being folded up and tied closed with the tie before being sent to the person it is adressed to. In fact if you look at the back (second image) of the royal writ above, you can more clearly see the fold marks, and a person's name, presumably the recipient.

So how did this habbit of folding up a writ or other doccument develop? Well, actually, rather than develop, this is a relic of the wax sealed letter. Although the writ is not longer sealed closed, people were still used to the king's word arriving in a folded letter. The tie was simply a way of keeping the doccument closed when there was no longer a blob of wax to keep the doccumnet sealed. And actually keeping a writ folded up was probably a better way of preserving it in a easy to store form than a long scrappy piece of paper.

The ever informative medieval writing website delves more deeply and provides more examples of the sealed 'letters close' from which these habbits developed. She uses the term letter close only for letters which are sealed closed with wax (as I shall), but points out that any doccument presented folded in this manner (sealed shut or not) could be called so.

Here's annother 11th C example, still in the genesis era of using seal tags.


Royal writ of William II
1096-7
Seal: Great seal in white wax with light brown varnish.
Wrapping: Wrapping tie present. 3 vertical folds and one horizontal fold.
(Durham D and C Library, 1.1.Reg.8)


There's a bit of variation in where on the tag the seal is sealed, but the general format is adhered to.

Giles provides some excellent examples of medieval period letters, both open and tied closed. In the last post I talked about how I think integral tags became used for less and less important transactions. You can see that the examples he provides are no longer grand royal writs, but more everyday doccuments - personal transactions, beurocratic ones, but not at the level of official writs of royals, but still important, and not the type of transaction you expect to have to keep more than a couple of years (unlike some of the 11th C royal writs which are more like the deeds for your house). As the writs have grown longer, and the seals are smaller seals associated with lesser personages or private transactions, now the seal can be more safely tucked inside the closed letter. The short 11th C royal writs with the grand royal seal shown above, the writ would have folded up smaller than the seal itself.

If you go back to the previous post, you'll find plenty more examples of ties, and there will be a number more in the next post too.

I'd like to move forward in time to the 16th C now, and that other large cache of integral seal tags. Below are two examples of integral tags with a tie. Note how while the seal tags themselves of this period cut only a short way across the page, in many of the examples, the ties cut a long way across the page. In these two examples, one might think the tie was used to close a doccument, but these are actually used to "staple" two doccuments together. There is no particular structural differences between a tie used for wrapping and a tie used for fastening to other doccuments, so where the tie is not attached to anything and no deep folds in the doccument are present, we can't be sure in which manner and particular very late period doccument was used.

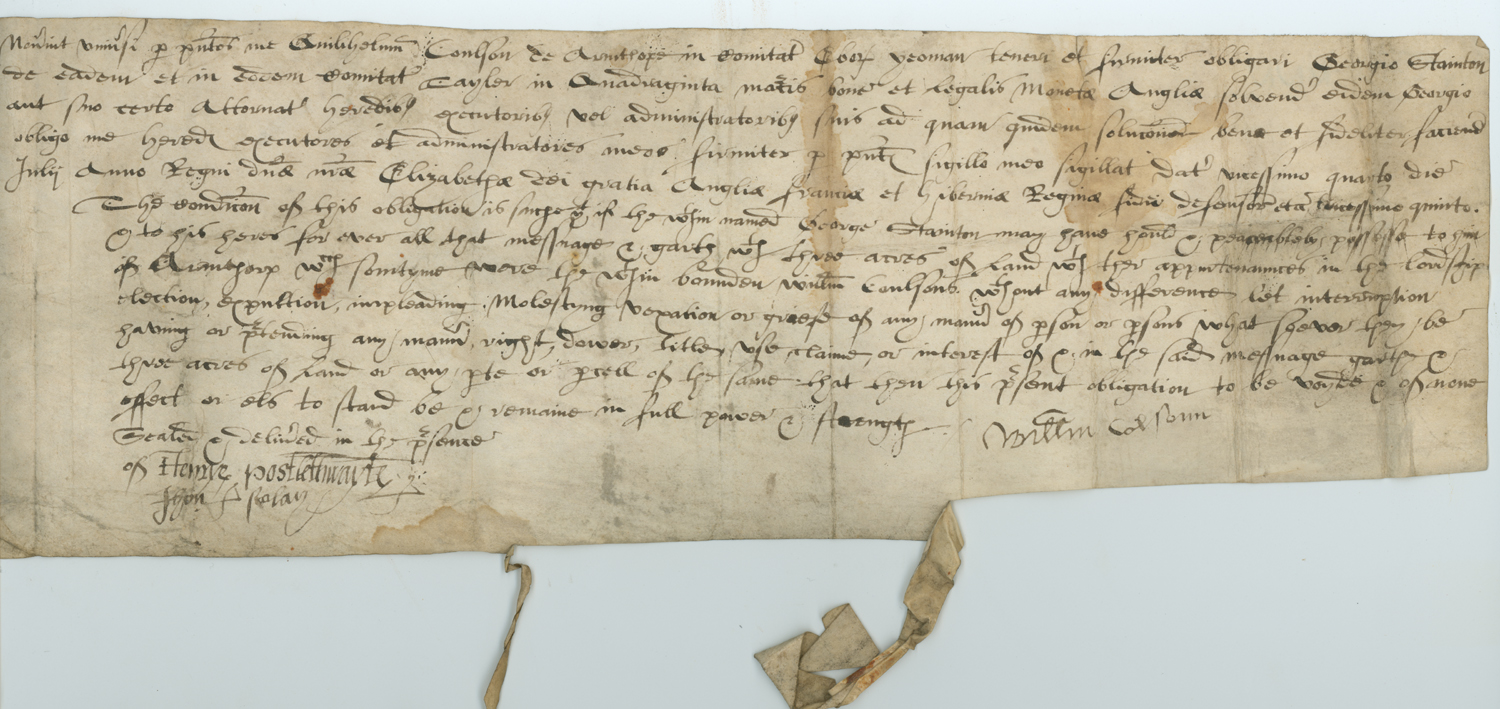
Bond by William Coulson to George Stainton for quiet possession.
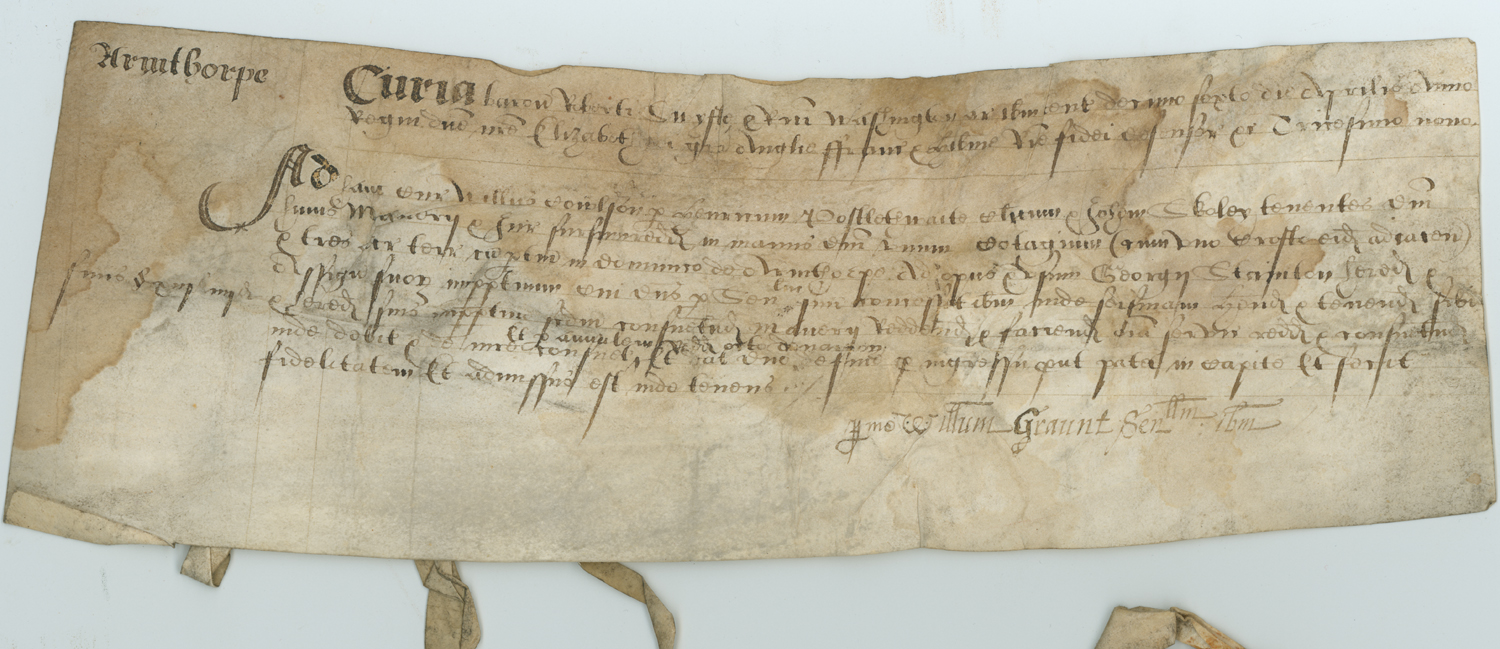
Surrender with admittance by William Coulson and others to George Stainton of land in Armthorpe, Yorkshire.

1593 (bond) & 1597 (surrender)
Doccuments: A pair of doccuments, one a bond (morgage?) by a "tailor" to a "yeoman" and a surrender (handover of property to pay debt?) a few years later.
Seal: Bond has seal tag missing seal, surrender unsealed
Wrapping: Tie on Bond binding it to surrender.
(McMaster University British Legal Instruments Collection No. 33)


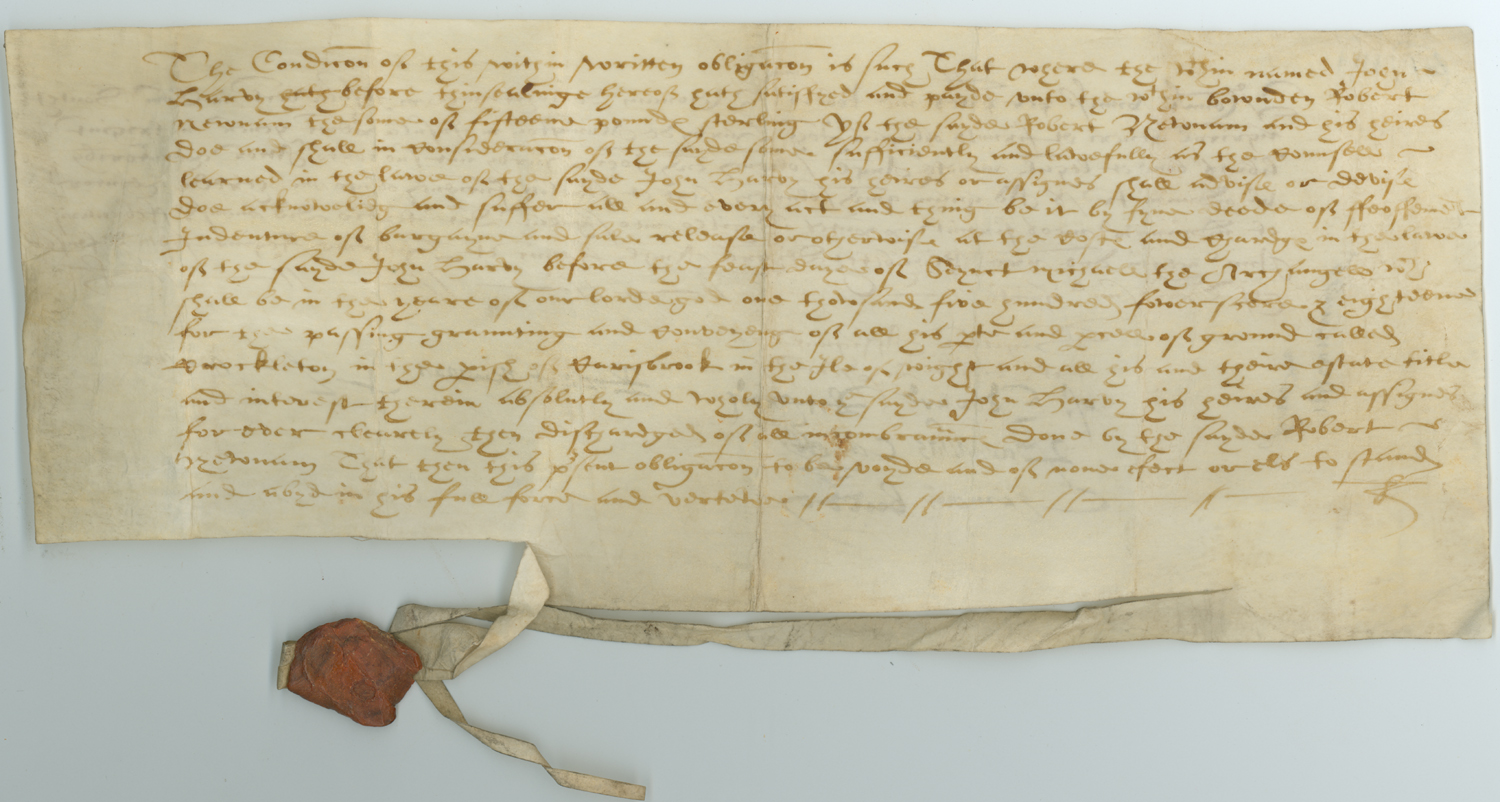
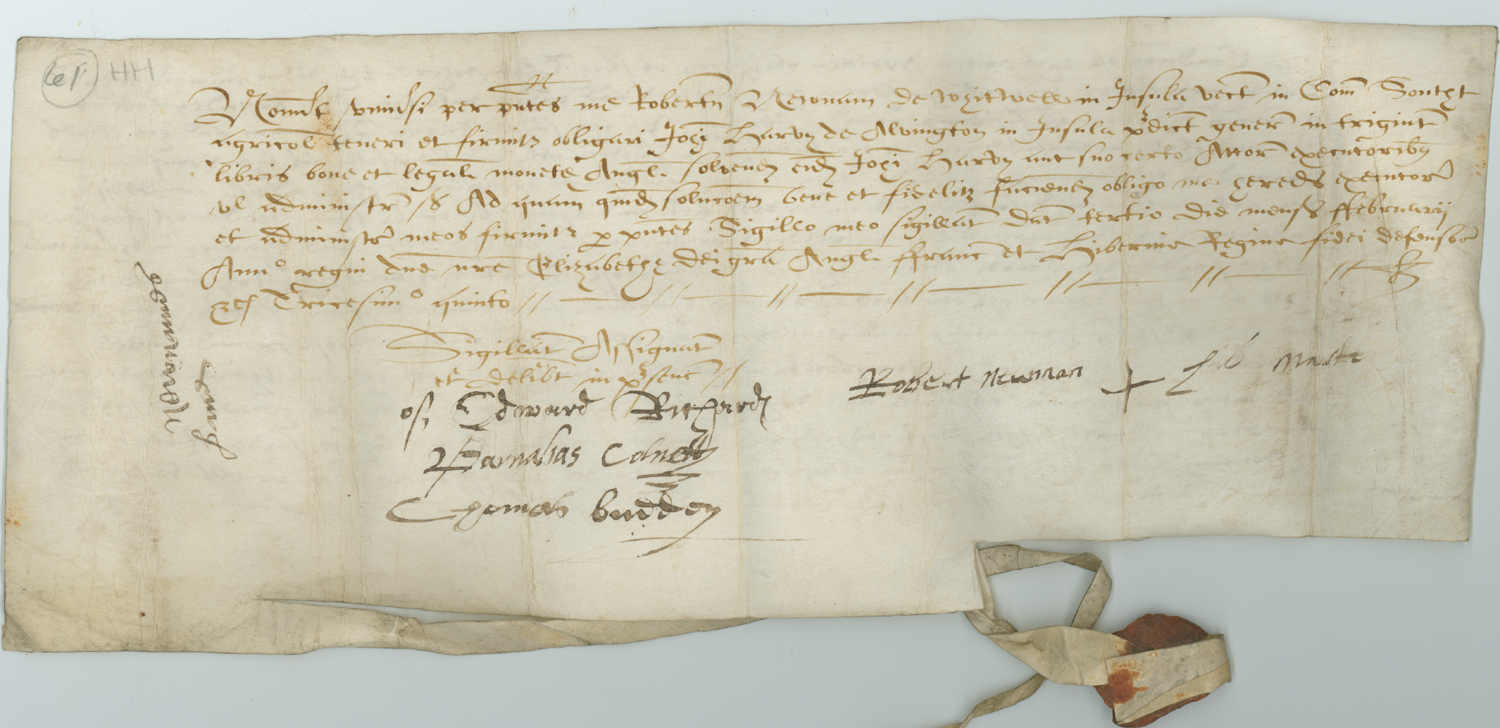
Bond by Robert Newnam to John Harvey for performance of covenants.
1592/93.
Seal: Seal of Robert Newham (farmer) red wax, worn smooth
Tag: Seal tag and tag used to bind to associated deed (now lacking)
(McMaster University British Legal Instruments Collection No. 61)


Finally, all the above examples are of integral seal tags with ties. Here's and example of a tie fastened through the slits of a seperate parchment seal tag...

Forged charter of Bishop William of St Calais
c.1160-70 (proports to be from 1080-96)
Seal: appears to be yellow wax with a brown varnish
Tag: 3 slit dependant parchment tag, folded double. Single layer thin tie for wrapping passes through top slit.
(DCM, 1.1.Pont.4a; Durham Episcopal Charters no. 4a)


And here's annother which might be a version of the same thing (or it might have been an accident):

Charter of Henry II confirming land grant
1166-1169
Seal: Appears to be great seal of state, brown wax
Tie: Parchment dependant tag and extra thin integral tie (for wrapping?) cut from turn up.
(DCM, 1.2.Reg.12)


Longer fibre tags could also be wrapped around a doccument, but I have no proof if this was actually done. I see less fold marks on later doccuments, which might mean folding became less important. Probably the need to fold the doccument up decreased as period progresed and more doccuments were stored in an establishment, so standard storage processes developed. But that's just speculation.

Wednesday, 10 March 2010

Examples of integral parchment tags

Today I'm going to show a number of examples of what I'm calling (since I haven't found a proper technical name for it yet) the integral parchment seal tag. I've already outlined these basic types of tags earlier, today I want to show some of the diversity and breadth of use of this very simple tag type.

Click on the small preview image to link to the original source, and links to the full description of the item will be given in the brief item description. My comments upon the item are presented in italic. I've presented the tags in roughly chronological order. And have a few comments regarding the chronology of this style of tag's use at the end.

You'll notice I've written a number of pieces of information in the captions - anything that might be relevant to the process of recreating a sealed document. Don't worry if some of the terms are confusing, I'll be trying to explain these a few at a time in coming posts.


examples of integral seal tags


Royal writ of William I (the conqueror)
1087, before 9 Sept.
Seal: Double sided Great Seal of State in white wax.
Wrapping: Small tear bottom left corner probably was a tie.
(British Museum, Ms Cotton Ch. xvi 2)


Writ of William I
1087, before 9 Sept.
Seal: Double sided Great Seal of State in white wax.
Wrapping: Tie located below seal tag.
(Westminster Abbey Muniments, xxiv)


Writ of William I
1095.
Seal: Double sided Great Seal of State in yellowish white wax.
Wrapping: Small tear bottom left corner probably was a tie. 2 horizontal & 3 vertical folds
(Durham, Diocese and Cathedral Library, Misc. Ch 558)

writ of William II
Pont-de-l'Arche, 12 Nov 1098
Seal: Double sided Great Seal of State in white wax covered in light brown varnish.
Wrapping: Stub of wrapping tie visible. 3 vertical folds and possibly 2 horizontal folds.
(Burgley House)

Writ of William II
1099, after June 5.
Seal: Double sided Great Seal of State in white wax covered with light brown varnish.
Wrapping: Remnant of tie. 2 vertical & 2 horizontal folds.
(Durham, Diocese and Cathedral Library, 1.1.Reg.4)

Writ of William II in favour of canons of St Pauls Cathedral
Brockenhurst, 6 July 1099.
Seal: Double sided Great Seal of State in white wax covered with light brown varnish.
Wrapping: Wrapping tie. 3 vertical and 1 horizontal tie.
(St Pauls Diocese and Cathedral Library, A.59/4)


Writ of William II confirming grant of King Edgar
1095
Seal: Double sided Great Seal of State in white wax covered with light brown varnish.
Wrapping: Parchment wrapping tie. Two vertical and 2 horizontal folds
(DCM, Misc. Ch. 973)

Writ of Henry I
Wrapping: Thin parchment wrapping tie is visible.
(DCM, 2.1.Reg.17)


Document sealed by Adam de Clifton, knight, and his wife Margery
1363
(Public Record Office LR 14/26651)


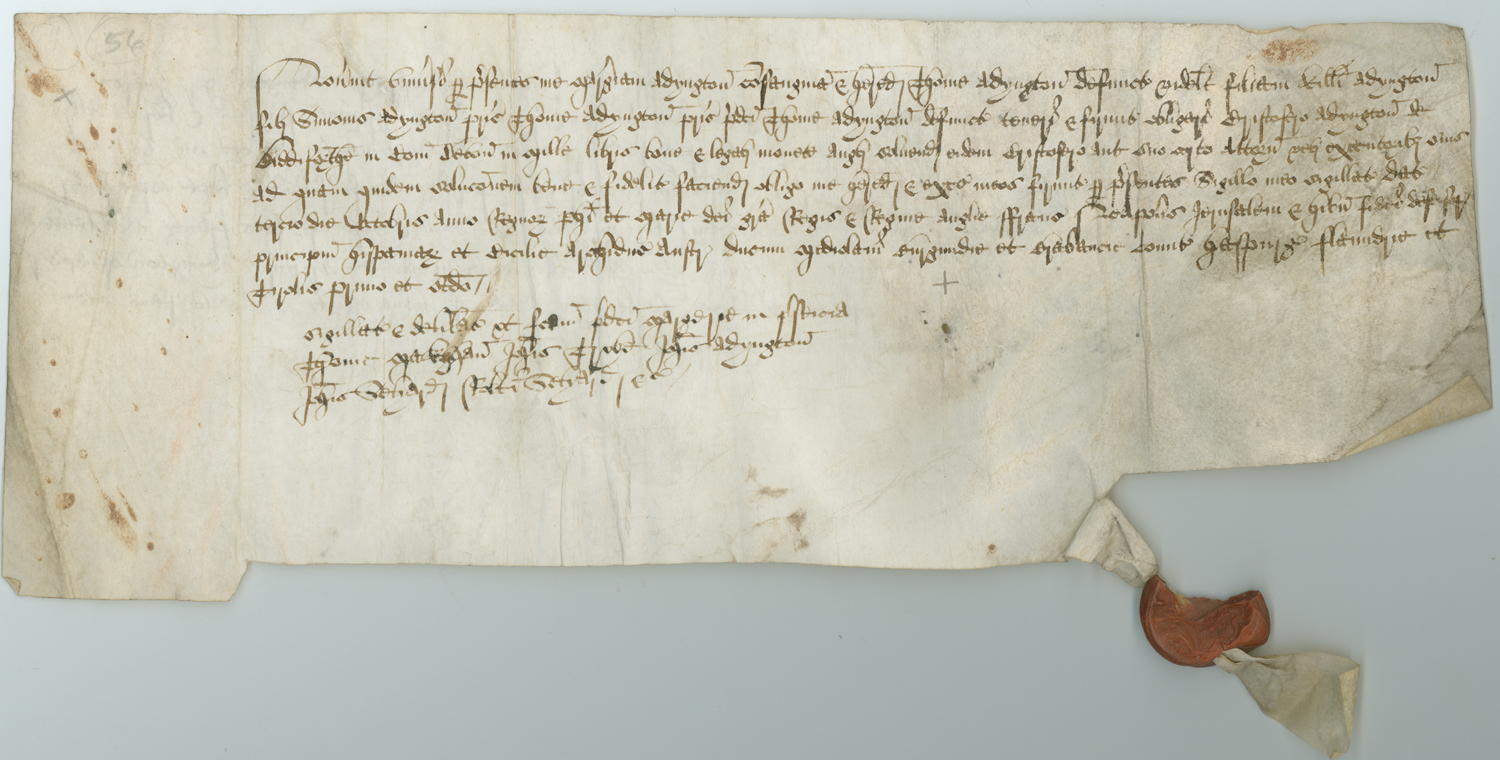
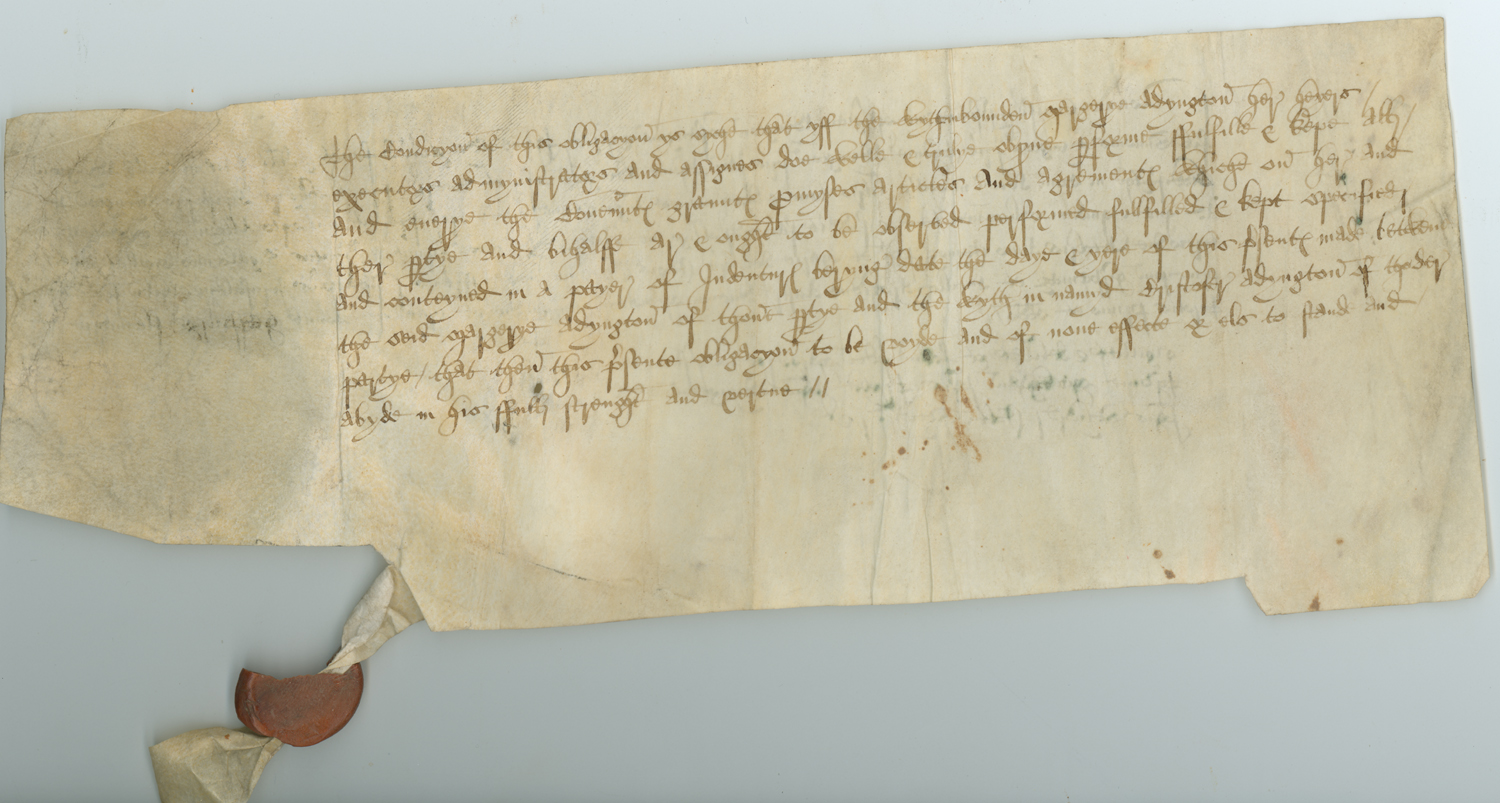
Bond by Margery Addington to Christopher Addington for performance of covenants .
1554
Seal: Red wax seal, depicting a coat-of-arms, cracked, portion missing.
Wrapping: Step in parchment corresponds to likely location for a broken off wrapping tie.
(McMaster University British Legal Instruments collection No. 56)

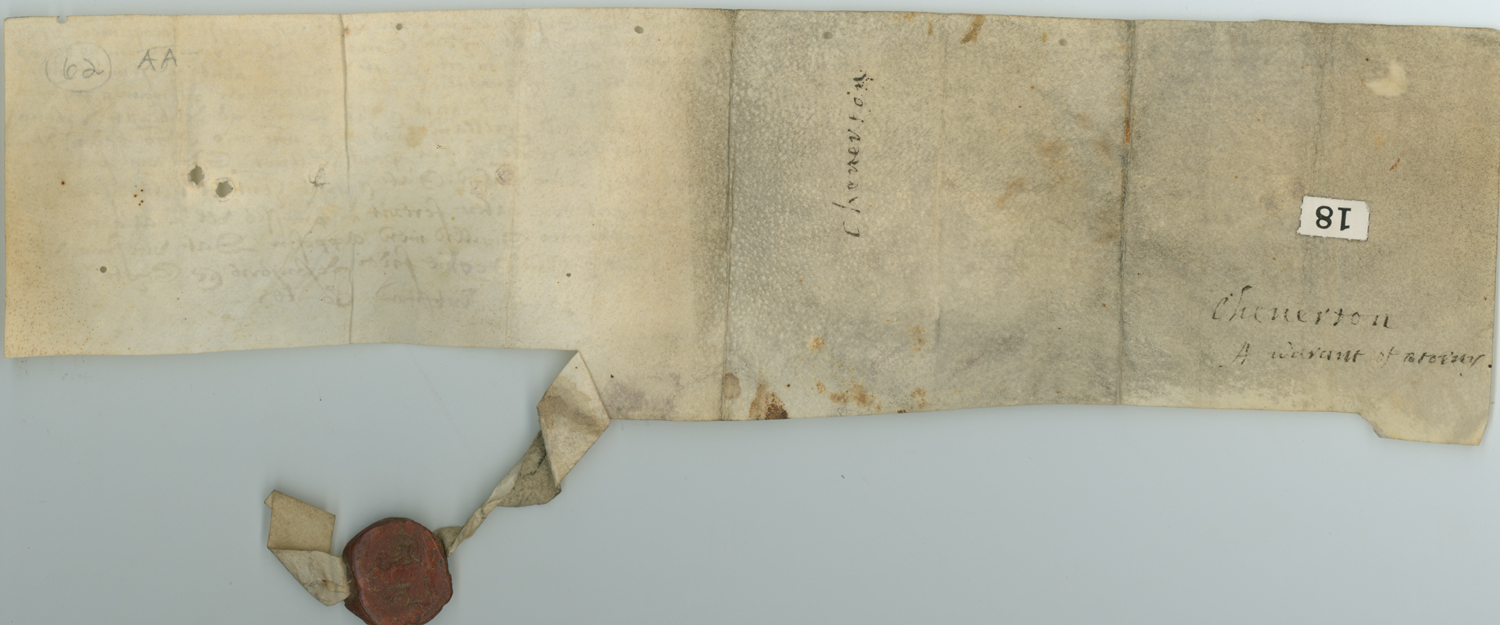
Letter of attorney by Arthur Genter to William Genter to deliver sasine to Richard Kedon of lands called Cheverton in Shorwell, Isle of Wight.
20 May 1564.
Seal: Red wax, depicting coat-of-arms with hand.
Wrapping: Step in parchment corresponds to likely location for a broken off wrapping tie.
(McMaster University British Legal Instruments collection No. 62)

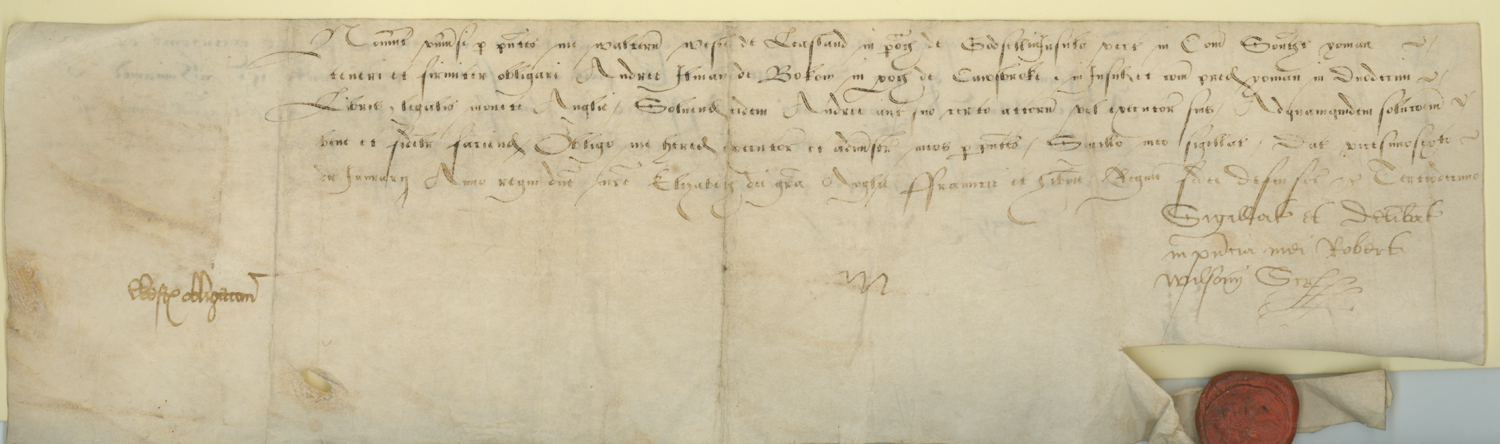
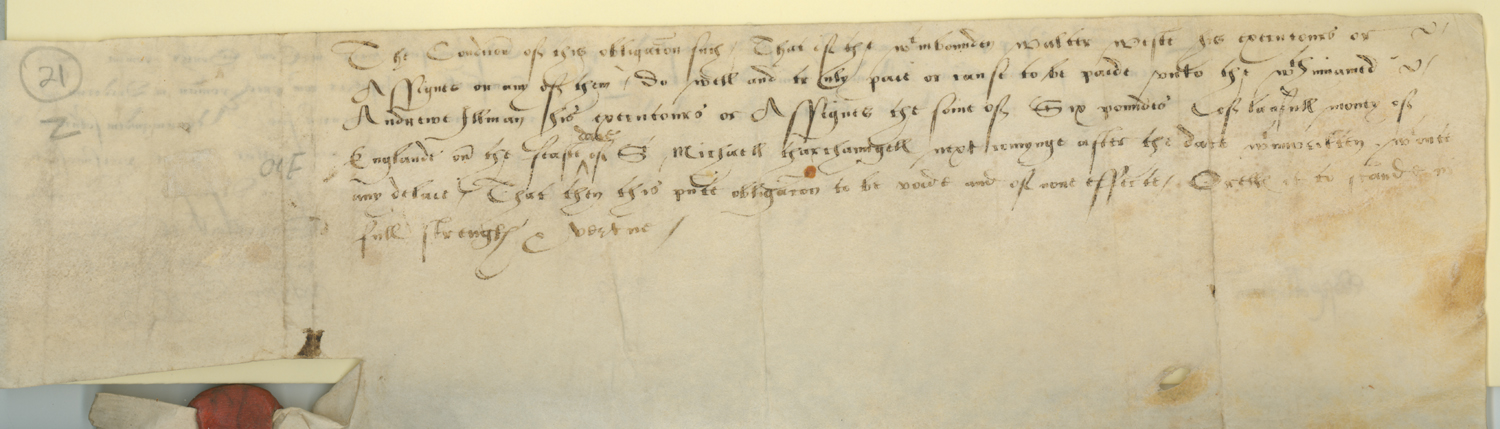
Bond by Walter West of Leasland to Andrew Ilman of Bowcombe, Isle of Wight for debt. (Deed poll).
1570
Seal: Red wax.
(McMaster University
British Legal Instruments collection No. 69)


Some observations from the above examples

Based on these examples, and more examples to be shown in the next few posts, the examples start with royal writs with the great seal, and letters patent in the 11th - 13th Centuries. Then there is a large gap with few documents, followed by fairly minor 16th C documents - promises to pay a debt,etc sealed with small probably personal seals. It's probable that as new styles of seal tag were developed, this style, rather than falling out of use completely, simply became used on less and less significant documents. Such insignificant documents are seldom preserved, especially with seals on them, so the few 16th C examples of this style might simply represent the greater chances of more recent documents surviving. Indeed such minor transactions were probably a spoken, possibly witnessed, agreement in earlier times, and likely only increased in usage as literacy increased (I imagine the transactors need not be fully literate, but they must at least have quick and easy access to a cheap scribe for minor transactions to be customarily written down).

It is of course also possible that this style fell out of favour, but was revived in the 16th C, although the singular example from the 14th C argues against this. A stylistic difference between the early and late documents can be noted - early tags are much longer and often thinner, generally cutting off 3/4 of the page width, while most of the late seal tags are wide and often cut only 1/4 of the page width. Both eras frequently have evidence of a wrapping tie (in fact every example above except the last one where the photo is not large enough), which I'll discuss soon.

Friday, 26 February 2010

Introduction to seal tag varieties

I recently spoke about medieval sealing practises. I'm now going to begin a series of posts that focus on seal tags. Seals on letters intended to be broken off as a simple security measure, but also acted as authentication of the sender. Seals affixed to the surface of a page of a public document as authentication of the writer had a tendency to fall off, which was a problem when the seal was the a major means used to prove a document was genuine, which was a concern in a rapidly bureaucratising society making the transition from verbal to written agreements.

Seal tags were a way to attach a seal to documents in a more secure way. That required that the seal was still firmly attached to the document (so that seals couldn't be swapped between documents), but would not be subjected to as bad a stresses as seals attached directly to the page were.

Today's aim is to introduce different varieties of seal tags. In later posts I'll give more examples of these, show you how to construct your own, and explore intricacies of construction.

In earliest form of seal tag, the spare parchment at base of the document was slit to form a long thin strip (like tearing up a minties wrapper), which the wax and seal was applied to. An example is shown below (click on the image to see it large, the links in the text for more provenance details). Like many other examples, there is a second strip of parchment, cut just like the seal tag, with which to tie the document closed when folded up. (which does suggest a possible origin for this method if it can be dated to before seal tags)


Charter with Seal of King Edward the Confessor
Seal in use 1042-1066, charter c1050. Diameter 70mm.
(London British Library, Campbell charter XXI.5)

Of course a long thin strip of parchment wasn’t very durable, and a seal didn’t authenticate a document it was no longer attached to, new ways of sealing were soon developed. This type of sealing was primarily used in the 11th Century, or on documents only expected to need to last a short time.

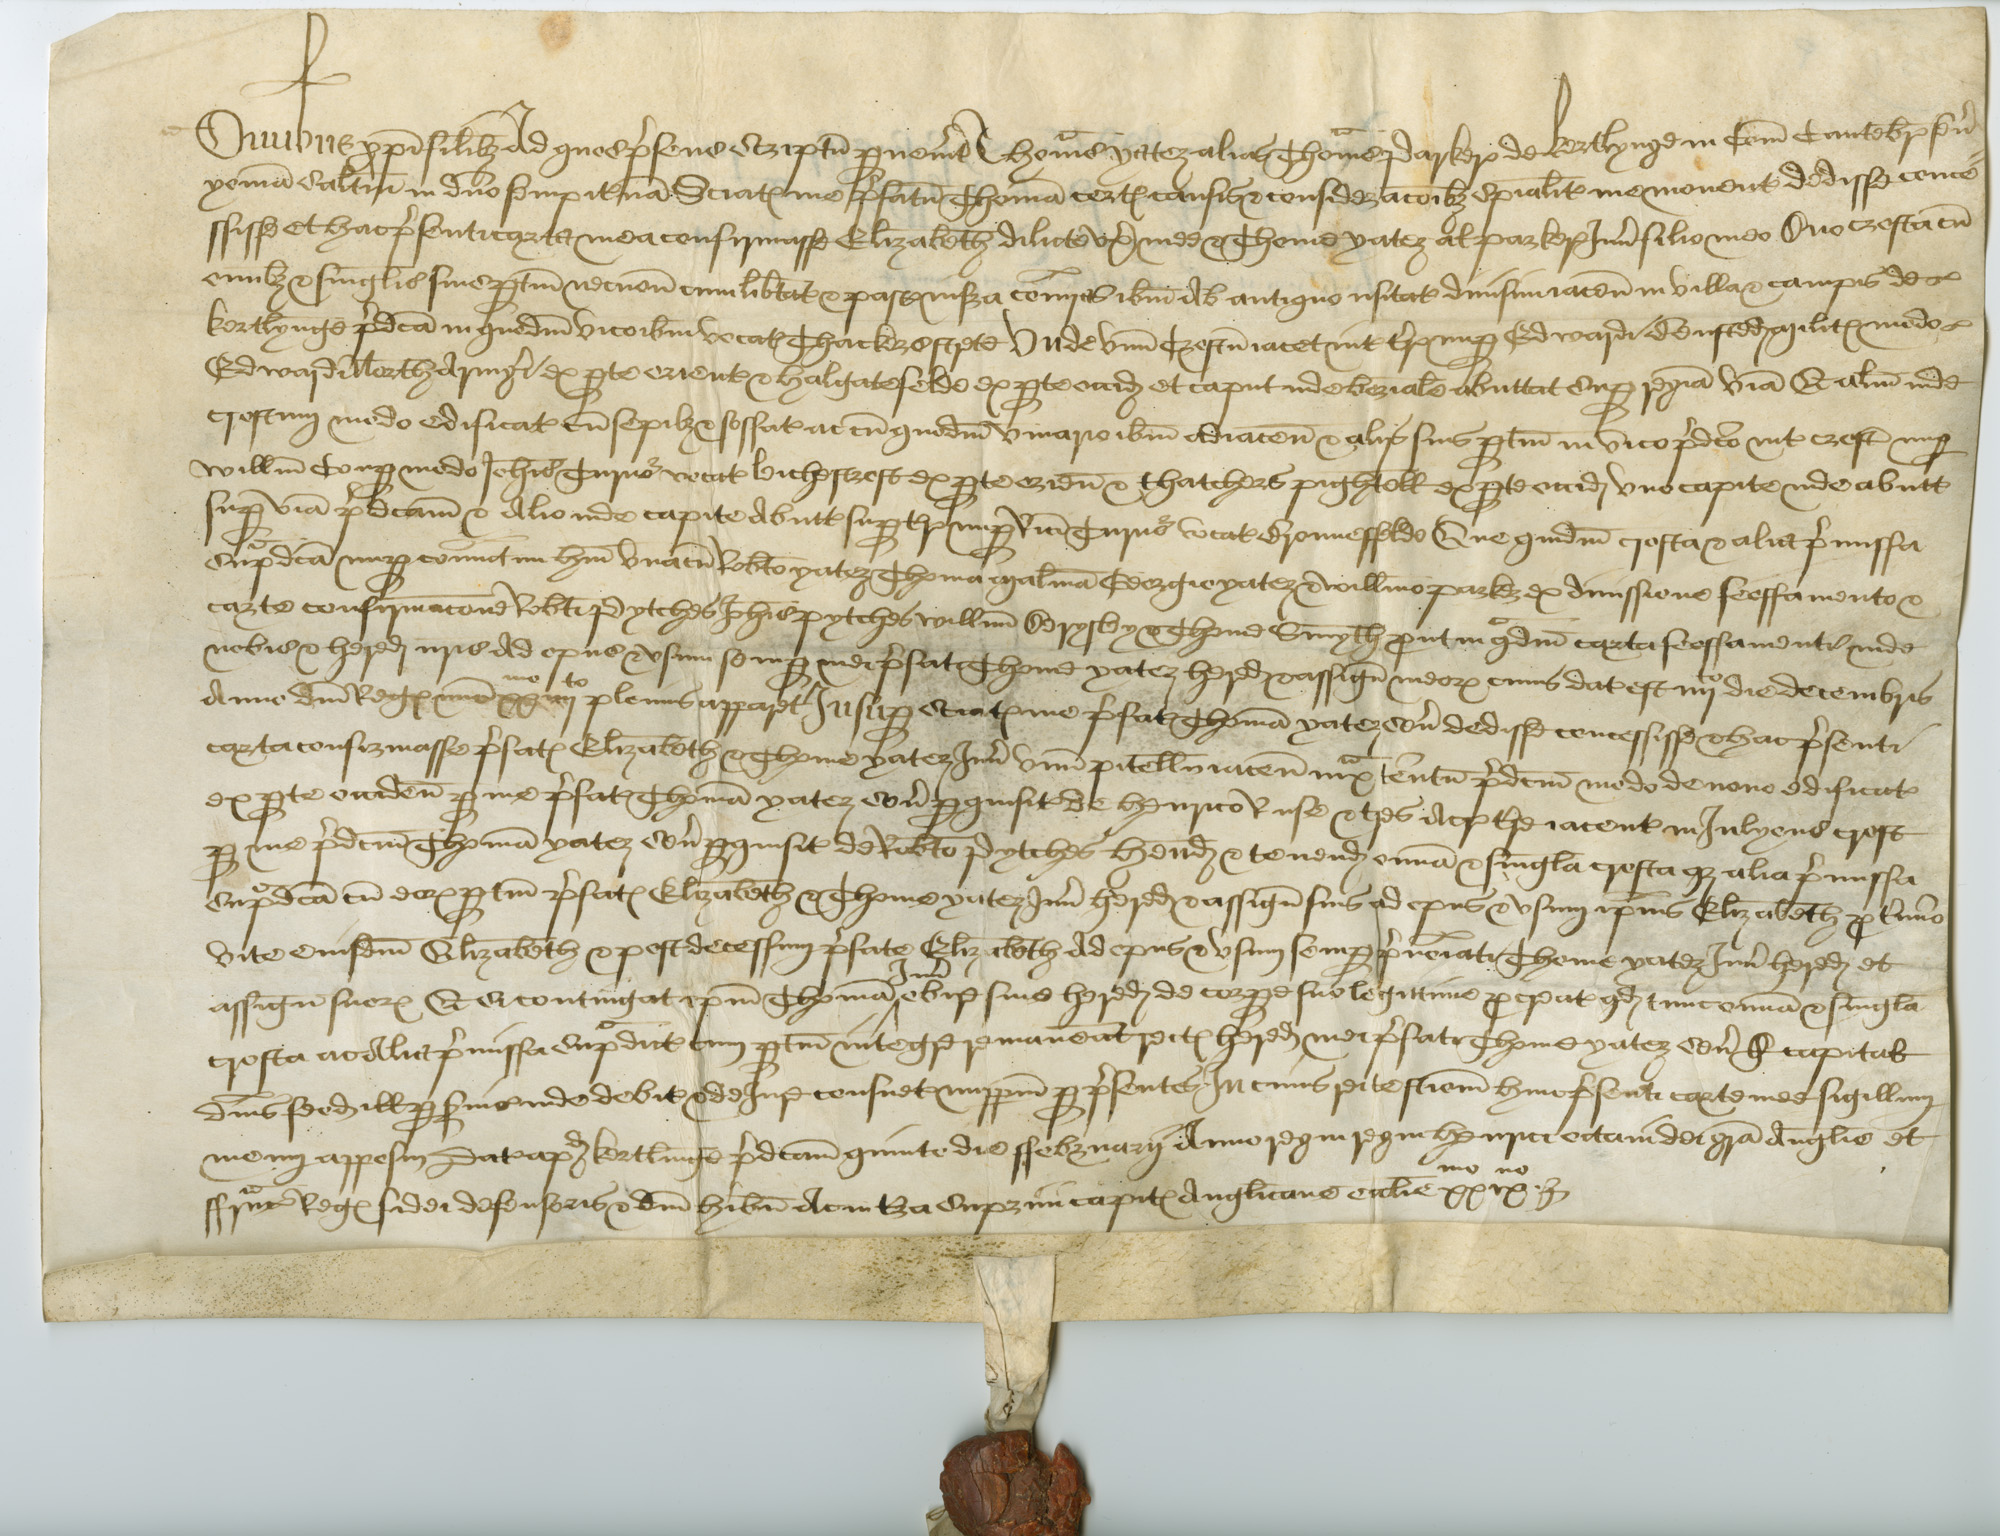
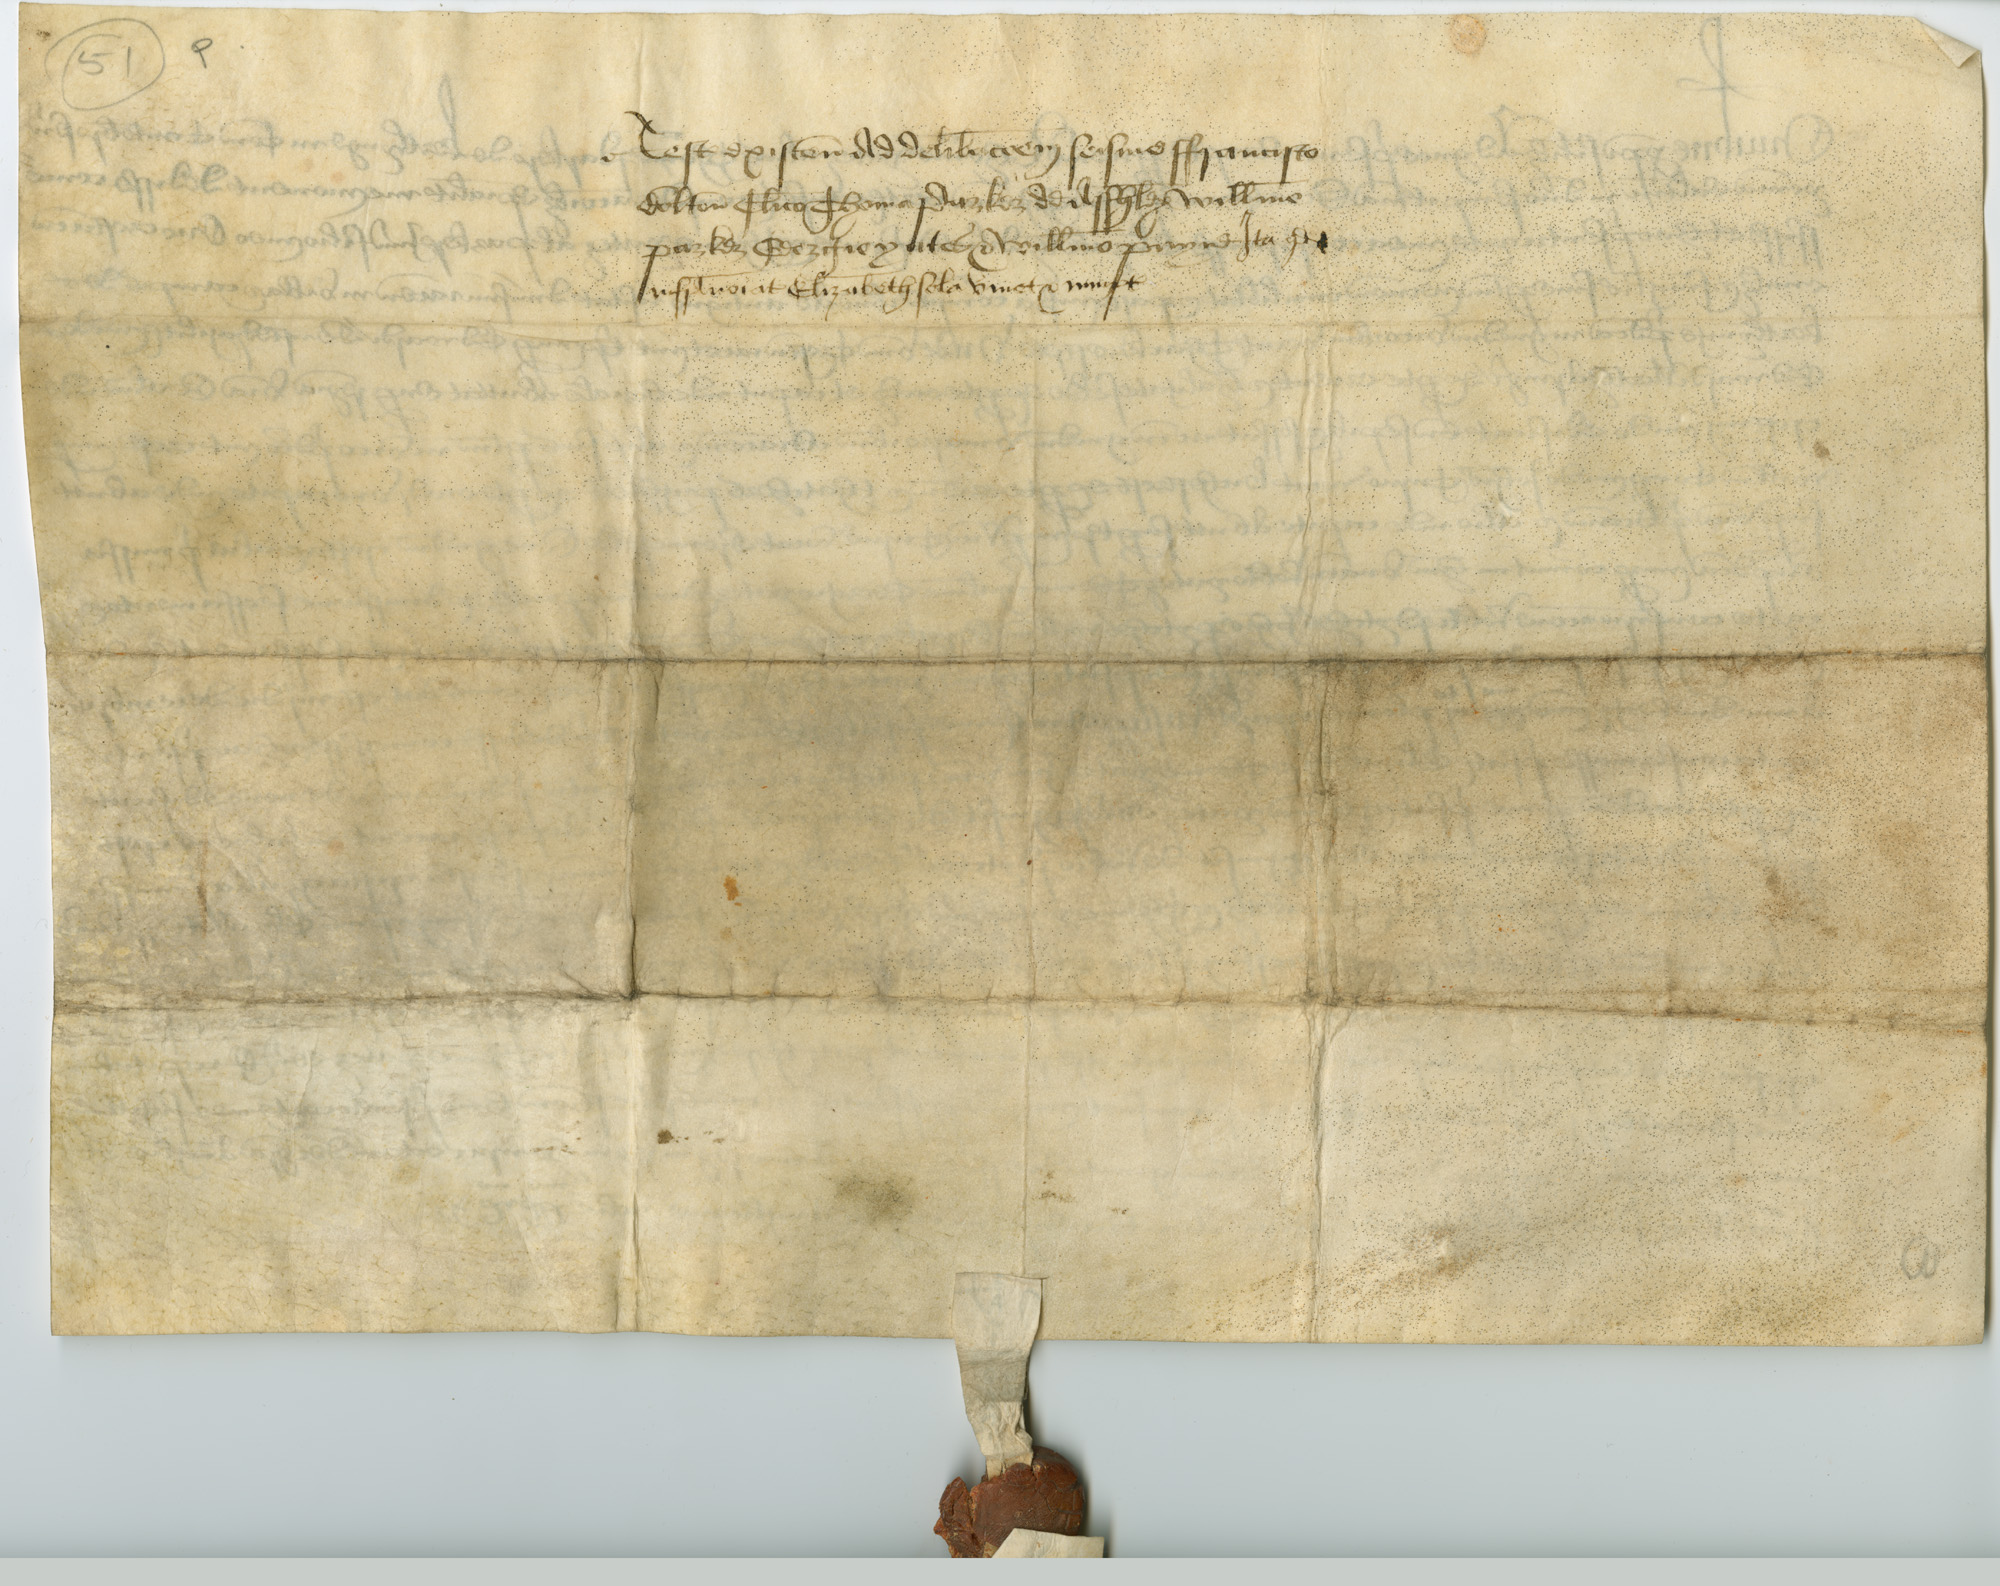
The most common form of seal tag by the 12th C is a strip of parchment which is a separate piece from the document. Any remaining parchment on the charter is folded up towards the writing so the edge of the parchment sits just below the end of the writing, permitting no space for additional words to be added. This turn-up is generally only a couple of cm wide - If large amounts of parchment remain at the end of writing a scribe could be expected to cut this off for other documents, and smaller portions for use as seal tags. One or three horizontal slits were cut in this doubled parchment, the width of the strip of parchment used as a seal tag. The seal tag was inserted through the slits with ends dangling below the parchment for the seal to attach to. The example below shows both front and rear of the document.


Feoffment by Thomas Yates alias Parker to Elizabeth, his wife, and Thomas Yates, Jr., his son, of a croft in Kirtling, Cambridgeshire.
1538/39
Tag with red wax seal, depicting a coat-of-arms (cracked, lacking portions).
Tag made from waste material, bearing inscription on inward side.
(McMaster University, British Legal Instruments Collection Ms. 51)

This parchment seal tag remained the most common variety of seal tag throughout the medieval and Renaissance periods. However, for some applications, a fancier document was desired. Just as fancier fonts and illuminated first letters could be used in the text, so could fancy seal tags be used. Such seal tags were normally made of fibres, braided or woven narrow strings. The earliest fibre seal tags I know of date from the late 12th Century, showing this technology developed quickly, although most documents stick with the utilitarian parchment seal tag.

The conceptually simplest forms of fibre seal tags (although often most decorated) are woven strips which replace the parchment seal tag in the same manner. Although the simplest seal tag to attach, these wider tags provide more space for more elaborate textile techniques, as seen in the example below.


William de Brus to Durham cathedral priory
c1194x1215. Double faced tabletweaving.
(Durham Dean and Chapter Muniments 4.8 Spec 2)


A form of fibre seal tag which uses a much simpler to make seal tag, but develops it's own method of attachment is the simple "twist" pattern. At it's simplest form the seal tag is a coarse piece of string (as exhibited on the papal bull below), at it's most complicated a narrow piece of braiding or weaving.


Mandate of Pope Martin IV for a case to be heard
1284
(DCM, 4.2.Pap.4)


One of the most complex forms of seal attachment is the "diamond" seal tag attachment. 2 braids or narrow cords are combined with a plait to make a pretty result, often with contrasting colours. The example below doesn't clearly show details, but you can see the diagnostic diamond pattern. This example appears to be a single coloured braid, but I'll explore the intricacies of the diamond pattern seal tag later.


Charter of Richard I, confirming to Alexander de Barentin, butler to Henry II, all his property fairly purchased or confirmed to him by Henry II.
12th Century
(London, Westminster Abbey Muniments no. 657).

A few much rarer fibre seal tag attachment patterns also exist, and I'll get to a discussion of these much later, when I've gathered more examples. (Please feel free to send me more, good photos of the tags rather than the seal or charter are hard to obtain, and with parchment seal tags the majority of tags, fibre tags are hard to find.)

Monday, 22 February 2010

Medeival Sealing Practises - An overview

Seals were an early security measure, used much like a signature to verify the authenticity of a document. A blob of wax was applied to a document and a small carved object impressed into the wax, leaving an imprint. Confusingly, the word seal refers to both the seal die/matrix (for example a ring) used to create the impression as well as the wax seal impression placed on the document.

As a security measure seals functioned quite well - they were harder to forge than a simple written document, although some medieval forgeries definitely did occur. The pictorial nature of the seal was tailored to a semi-literate society who would have been unlikely to be able to spot differences in a signature. The pictures carved into the seals also allowed an individual to express themselves, and make strong statements about personality, rank and power through small alterations to standard depictions.

By the high medieval period in western Europe, two types of seal existed, the personal seal and the official seal. Personal seals were used to close rolled up letters to prove the letter is still private and unread upon arrival. This functions similar to the way modern envelopes do - it takes a lot of effort to open a letter undetected, and deters all but the most persistent intruder. Personal seals also began to be used like a signature on small business and credit transactions - probably similar to using a credit card or signing an interest free sale today.

Official seals developed out of the personal seal, but were used on documents intended to be consulted multiple times, where the aim was not to prevent the document being read but to authenticate it as genuinely from you, like a signature on a modern legal document. Seals used to seal a letter closed are designed to break upon opening the letter, so a change in technology to preserve the seal was developed. Various forms of attaching the seal to the parchment were tried, developing into the seal tag - a strip of parchment or braid that attached the seal to the document in a way that could not easily be tampered with.

Personal seals tended to be small objects that could be easily carried around, such as a ring or pendant. Official seals were larger, sometimes double sided, and used only on official documents. Official seals were more formulaic and represented a persons rank, role and sometimes allegiances. Like a modern business logo (and motto), they could tell you a certain amount about the person's business aims if you knew the art of interpreting them.

Lower ranked people might only have a personal seal to use on all documents, personal or official, the official seal was a marker of status and position. Surviving seals matrices and seal impressions are mostly of the official kind, as the kinds of uses of personal seals are rather ephemeral.

My favourite period, the 12th Century marks the genesis of widespread sealing in England, when conventions were being formed, and experiments with the practises and material objects of sealing common. It also marks a rapid increase in the formalisation of legal documents into charters and agreements - a transition that began in the 11th C to a culture which records increasing amounts of information in writing, flourishes in the 12th C. Seals represent an important part of that transition because they provided an authentication for documents, and a form of authentication that was not a written word for those who were still suspicious of the new literacy. Adding your seal to a document added a degree of ceremony to an agreement, just as signing a document in front of witnesses does today. Such a ceremony was necessary to give this proposed replacement for old ceremonial practises associated with verbal agreements the same weight of ceremony.

By 1200 almost every man (or independent woman) who owned property or was in business in England would have had a seal, although many would have only a small multipurpose private seal rather than separate private and official ones. Seals were used in everyday transactions like agreements with moneylenders or pawnbrokers, and transactions involving small amounts of money, however few documents of this kind of transaction have survived. This is a big contrast to earlier periods - in the 10th C official sealing seems to have mostly been the province of the king, while in the 11th it has extended to the upper nobles, and in the early 12th C it seems to have been a noble only activity. Before these times, in Anglo-Saxon England, agreements were largely verbal ("my word is my bond"), and did not require writing down.

I believe continental western European practises mirror this fairly well, although possibly with a slight time lag. Sealing practises appears to be one of these practises that actually did have major innovations in England that spread elsewhere, namely the heightened use of seals and the development of the seal tag. This doesn't appear to be a solely Anglo Saxon or Norman thing, but rather a development that stretched across the transition between cultures. One can only speculate that perhaps the mixing of cultures was a catalyst for this development.

However, while the official sealing culture and seal tags may be an English innovation, there was a continental tradition of sealing official documents directly onto parchment, which can be seen on some documents of Charlemagne and early Papal Bulls. And the tradition of sealing letters close, I've heard dates back to roman times. However as a textile enthusiast, and 12th C western European reenactor, my research focus is on the wonderful invention of the seal tag, and the social traditions of sealing in the 12th Century.

This is my introductory talk for a series of posts about seals and seal tags. I've been looking into this for a while, but have only escalated my research and writing up lately, prompted by the scribes guild of Lochac developing new writs for presentation of AOA's (the SCA's lowest ranking award). Due to the rapidity with which I'm writing this up there will be details which I will get wrong or make inferences that are misleading. I'm afraid I may sound more authoritative than I really am, and my referencing will not be all I wish it could be. Please forgive me, I hope that having this information more widely available will outweigh my small errors. I also encourage you dear readers to point out my errors, discuss anything you think I might be a little shortsighted on, and ask questions, etc. I really appreciate having people do so as a quality check on my work, and so that I can have an interesting discussion on these matters. I always love the chance to discuss research, and have discovered the most interesting things because someone asked a simple question.

If you wish to find more posts in this series, but not to hear about my other textile exploits, look for the overlapping tags of "seals" (about seal dies, imprints and extant examples), "seal tag" (about seal tags including extant examples and how to's), and "sealing practises" (why people used seals - the sociological aspect).

Tuesday, 26 January 2010

I also cook medieval/renaisance food...

...and write about my results.

(the blog is a shared blog of local reenactor cooks in the sca region around me).

Saturday, 16 January 2010

A sort of new broach

I found a charming sketch of a broach in the Museum of London book "dress accesories", and just had to make a copy (following on from my other experiments with twisted wire from this book). There are actually 2 examples listed in the book:

#1339 c1150-c1200 diameter 26mm
gunmetal frame, silver pin
Slightly damaged - some of the fine loops are broken. Frame is a wire ring with ends joined by opposed loops. in has D shaped cross section and was added without a gap in the wound spirals.

#1340 c1150-c1250 or later 24x22.5mm
bronze frame
Spirals wound around frame 35 times, with each circit of the frame taking 7-8 small loops. Pin added at the small gap in the ends of the fine spirals.


A broach from Bedern St in York in this style is also mentioned.

I think the York broach is the broach shown on this page, mentioned as being of twisted wire. This same broach is shown slightly bigger on the york archeology photo library, direct links are not available, but click on 'medieval' and look at the broach at the bottom of the page, ref no 002359.

If anyone knows more about this, or can acess the report please let me know.:

Daniels, M, 1979, 'Bedern Site' in Interim 6/3, York Archeological Trust 19-27

(I keep getting the idea I should be able to acess it from the York archeological trust website, or find it on their gazeteer, but it's thwarted me so far)


How to make this annular

materials:


  • for the decoration: a very thin very flexible wire e.g. 26 gauge wire from my local art shop


  • for the pin: a thick sturdy wire, that will not easily bend under strain e.g. 1mm brass wire, or in desperation I used a hat pin that wasn't too bendy (difficult to bend with bare hands). Preferably of the same material as the decorative wire.


  • for the support: a moderately thick wire, that is at least moderately sturdy. This could be the same wire as the pin, so long as you have the means (eg pliers or hammer and anvil) to bend this into a circle, or a somewhat thinner wire (eg 0.5mm) could be wrapped around multiple times. As this will be hidden inside the broach, this doesn't really have to match the metal of the other wires. I used copper wire stripped from electrical cables, and found this a little weak. For best results it is important that this wire doesn't bend easily in your hands. A premade metal ring of suitable size (eg curtain ring, metal o-ring, cheap plain finger ring) is very likely to be suitable, maybe better, but I haven't tested this yet.
Step 1: Construct a support
Find a circular object the diameter of the desired broach. The archaeological examples are quite small - the size of a large finger ring, but you could make a larger one. The object must have a fixed diameter section, and no lips that protrude at the rim, so you can easily slide the object off. You could use a special jewellers ring form, or just a bottle lid, a fat pen, or any other mostly cylindrical household object, or if desperate you could try doing this step freehand.

Take the moderately thick wire and create a circle by bending it around the object. Grabbing the ends with pliers may help with this step, if it is a bit thick. If the wire is a bit thin (or a bit weak/too bendy), wrap the wire around several times instead of just once.

Finish by crossing the wires over, then sharply pulling the wire back in the opposite direction, creating a U bend which contains the other wire. This will be much easier by grasping the ends with pliers. For thicker wires, you may find it easier to use pliers (or a hammer) to shape the u-bend before you loop the two loops together.

Remove your support ring from your shaping form. It should hold it's shape, now squish the loops down so they don't stick out much more than the surrounding wire.


Step 2: Make a tiny spring
Find a long thin object of approximately 1-2mm diameter, with a nice even diameter, with at least one end (prefereably 2) finishing smoothly without a wider diameter at any point of the edge. I used a large darning needle. The interior ink case of a biro, thin knitting needles, stiff fat wire (like you might have used for your support) are also probably about the right size.

Leaving a few cm of unwound leader, start winding the very thin wire tightly around your object, creating a spring. If you start in the middle, and pull the needle (or other object) towards the end you are winding towards, you can make a spring many times the length of your needle.

Wind until you have a spring approx 5 times (I think - I need to test this more) the circumference of your supporting ring.

Step 3: decorate your support
Wind your leader tightly around the support, approx 3 times, ending at the start of the spring. Chop off the remainder of your leader. You will also need to cut your spring from any reels of wire.

expand slightly the first cm of the spring. Wind this expanded spring around the support, passing through the centre of the supporting ring. Keep expanding and winding until only approx 2mm of the supporting ring is uncovered. If your thickest wire is thicker than 2mm, make this 1mm wider than your thick wire. Tightly fasten the end of your spring in a similar fashion to the way the start was fastened, and clip off any remaining thin wire.

If you run out of spring, tightly fasten the end as above. Then wind a new spring and add this to the support as tightly to the first segment as possible. It should be possible to mostly hide the join, but write down how much extra was needed in case you plan to make another broach with the same materials.

Step 4: add a pin.
starting at the end of your thick wire, bend a U shaped curve, twice the thickness of your support. This is easiest by placing a pair of round nosed pliers where you wish the bend to be, and using another pair of pliers to bend the wire. This will be your pin.

Test that this U bend in your pin will slide onto your support. If it doesn't fit, adjust with pliers. Make sure there will be enough wire to bend and complete a circle around the support, but do not bend this yet. If there is more, cut the excess wire off, if less, unbend (or cut off bend portion) and try again.

With the pin still sitting on the support , mark the point where the pin just lies over the support on the opposite side to the bend. cut the wire at this point. If this is too short, the pin will pass through the decorative wire and fall off your clothes. If it is to long, the pin will be very difficult to fasten or release.

Remove the pin from the support, and sharpen the unbent end. Experiment with whatever objects you have to hand made for sharpening eg nail files, emery board, wood files, whetstones, sandpaper knife sharpening steel, etc, so long as the object is expendable. Don't break or ruin your best tools with this, unless you know this is the job they are designed for. If your file is coarse, it will be best to use a finer file to finish the job. Hold your pin so that it is at an approximately 15 degree angle from your sharpening surface (i.e., just enough space to almost fit a finger between it and the plane of the sharpener, and roll the pin along the sharpener, to create a pointy end.

Clean off your newly sharpened pin point on a rag or offcut of similar tightness of weave and thickness to the garments you will regularly wear the broach on. Test pushing the pin through the fabric, and make sure your pin moves freely through the fabric. If not, file some more, possibly with a finer file. If you plan to use your broach on white or very pale fabric, test your pin on a waste scrap of tightly woven pale fabric, poking it through the fabric to see if a dark mark is left. If so, such corrosion can be cleaned off your broach by rubbing it with a rag and tetsting by continuing to poke holes in your scrap (until it comes away without a mark), but note that if the broach is not used regularly, the corrosion is likely to return.

Attach your sharp pin to your broach support


With the pin still sitting on the support , mark the point where the pin just lies over the support on the opposite side to the bend. cut the wire at this point. If this is too short, the pin will pass through the decorative wire and fall off your clothes. If it is to long, the pin will be very difficult to fasten or release.

Remove the pin from the support, and sharpen the unbent end. Depending upon the composition of your wire, a number of substances may work: a metal file, sandpaper, a whetstone, knife sharpening stick, nailfile, emery board. Test carefully though - the wire may not be friendly to your sharpener, so best not use anything expensive unless you know it is the proper tool for the job. Sharpen by rolling your wire along the file, holding the wire at an approximately 10 degree angle from the file.

If you used a coarse file, be sure to finish the job with a finer file, so there are no sharp grooves or cuts in your metal that might catch on your clothing. Test and clean your point on your pin by pushing it through a rag of a similar weave to the garments you plan to wear it on.

Slip your pin back onto to the support again, as before, then tighten up the bent end so it now completes a circle around the support. This is best achieved by holding the flat portion of the pin with a pair of flat nosed pliers, and

Do not attach it so tightly that the pin cannot rotate freely about the support.

Step 4: Wear the pin

This takes a little practise. Attach your pin by placing the broach against your garment, with the pin's natural closing side on the outside (non garment) side, but open the pin so the circle of the broach is free. with two fingers, pinch a small bit of fabric within the ring of the broach. pull this through the ring, past where the pin normally sits, and to the side opposite the pin's hinge. Insert the pin into the pulled bit of fabric. Move the fabric to the middle of the pin, then release. Your pin should be in place, and ready to proudly show to your friends. Do the reverse to unfasten the pin.


If you still find inserting the pin a bit tricky after a few practises, your pin may be a little long - it needs to be long enough that it cannot fall through the ring, but no longer than this or it is awkward to fasten.

If you find your broach comes undone often, you (like me) may have used too weak/pliable support materials (either ring or pin - whichever bends out of shape). Ultimately this ammounts to a lesson learnt in what materials to use next time, but if your broach bends you can probably bend it back, and try to use it in a lower stress situation 9eg as a decoration rather than to hold a neckline in place) next time.

Note mine is nearly twice the size it should be compared to the historic examples - something to improve later.