Occasionally people ask for lesson notes from my standard beginner fingerloop braiding workshop. Which is silly really because it's a workshop - it's about doing, and any notes I produce are just to remind people of what they have done. But it occurs to me that the way I've ended up formulating the format and material covered by the workshop is very much based on specific thinking and facts, and it might be useful to share this with others. If you can fingerloop braid, and want to run a workshop to teach others, but aren't sure what format to use, feel free to use this plan wholesale or just use my reasoning to help clarify your own reasons for running a completely different format, or any degree in between. And I really don't mind if others run this class format at an event I'm at - this would free me up to run an intermediate fingerloop braiding class or talk about my other obsessions.
So let's begin with the class description and the reasons behind it:
For absolute beginner to intermediate fingerloop braiders
I aim this class at absolute beginners, but there are an amazing number of people who have learnt only one braid, or attended the class last year and forgot what they did in between, and the rest of the class will be at their level after the first half hour. There are also a number of intermediate people who might benefit from the formalisation of their thinking - this class sets people up for a mechanical view of fingerloop braiding patterns, while many sample book methods teach a whole different view of braiding. Intermediate people also can be really helpful to help reteach what you've just explained to an absolute beginner. And if numbers are low, you get a chance to do some one-on-one extension activities for your intermediate people at the end. If advanced fingerloop braiders turn up, see if you can rope them into becoming permanent teachers assistants.
Length: 2 hours
I run this as a "drop out when your fingers are tired or your brain is full" class. So at the beginning, everything will be very busy, but later on, you'll generally be left with the people who are learning very slowly or the people who are learning very well and are looking for more advanced or additional material. By the end of the class, you should have more time to teach new methods, or sit by a person as they painfully step by step manage to produce a braid. Some people are quite happy to learn a single braid - more is just confusing them. One-on-one I can generally teach most people to fingerloop braid one pattern in 5-20 minutes, and to do 3 more patterns in under an hour if they are happy to learn this much - but generally with times when I am sitting being bored half the time. So doubling this time to teach a larger number of people the same amount of material is quite feasible, so long as some people drop out when they've learnt enough.
It is important to tell people they don't have to stay for the whole 2 hours and they can leave when they want to at the start of the lesson too - otherwise a whole 2 hours of class can seem quite daunting.
I often get people asking if they can attend the class starting at the halfway point. I use my discretion - people known to be adept at other fibrearts with dexterous fingers will generally pick this up quickly enough to be no bother. People who already know a little but have half forgotten it will also be fine starting an hour in. Unknown people, I generally point out that I might be a bit busy to explain much when they turn up, but will probably have time to show them more in the last half hour.
It's a good idea to arrange your class so that at the end of the class, if you run overtime, or someone still wants something explained you can be around to help, so I try not to have any activities immediately after my class, and where possible to have a space that will sit empty following the class.
Class size 5-15
Start small, limit your class to 5. I was lucky to have such a small class the first time, and really needed it to pay enough attention to everyone. If you like, allow extras to be spectators, and if you find the class is more manageable than you thought, you can invite them to join the class. The next time I invited a friend who also fingerlooped along and had twice the size. By the time I had a full 15 people, I was getting quite practised (and had the odd helper again), but still found it quite intense and draining - supreme organisation, practise and understanding was needed. If you have too many people turn up feel free to offer to run another class later for half the class. Or explain to the class that because of there being so many people, it'll take a bit longer to get to everyone and ask them to be patient. Teach a few people one-on-one first before you even try a 5 person class.
I've had a class with 8 people but where half the class were not very dexterous or used to other braiding styles, and found I struggled to get around to visit everybody in a timely manner. One slow student can really limit your ability to help the rest of the class. Also don't forget to anticipate how you will feel on the day - are you likely to be overtired, hungover, hungry, or racing from one appointment to another? If so, reduce your class size as these will all reduce your ability to teach larger classes.
For: Adults, teenagers and accompanied children over 8
I read someone explaining about children and craft that on average finger dexterity gets significantly better by age 8. I'm not sure if this is due to some biological cause or that children have been doing a range of dexterity and fine motor control training exercises in pre-school and school by then (writing is a dexterity exercise if you've never done it before). Feel free to make exceptions if you know a particular younger child has above average motor control and concentration, (although you might wish to consider if you will be being fair to the rest of their friends).
The aim is to not have a child who requires more attention than your average adult. Having an adult accompany the child means they are highly likely to have a personalised reteacher, who can comment upon and encourage every step of the process, while your run around to other groups (there are adults like this too, but generally only 1 in 20, and you can't work out who they are beforehand). This requires having one adult per child and also an adult who is genuinely interested in learning how to braid themselves, even if only for the ability to reteach to their children. If you suspect the adult might not be able to act in this capacity (for example they might also have a 3 year old with them), you might offer to give them a personal lesson later, or even suggest they come back an hour into the class when the rest of the class is quieter.
The children I've had in my classes have required a bit more repetition of having someone reminding them of the steps of weaving, and more reassurance, but generally produce a better result than the average adult, because they are more worried about details and getting it wrong. Generally children are happy to make only one kind of braid, but like to repeat this several times over - let them do this, ask if they want to learn another pattern, but don't discourage their learning by complicating things more. Trying the same braid in different colours, especially those of the child's choice, tends to be pleasing to preteens.
Beginning the Class
Below are some notes on how I carry out the class.
Introduction
As this is a workshop, the aim being to get people braiding, I try to keep the introduction short. I talk for only 10 minutes on what fingerloop braiding is and when and where it was used, and where to find more information. I don't have a fixed speech for this - I generally talk off the top of my head, adjusting it each time, but it is a good idea to have some pieces of paper with a list of links for people to look up later. This also allows for late comers to join in without missing much braiding.
As I talk, I ask people to to cut their own pieces of string - 2 in one colour and 3 in another. (This confuses people a little, if you have several balls of string in 2 colours, it might be better to say "2 red and 3 blue" so that everyone has a common frame of reference). You might wish to use precut strings, but I don't because as well as being fundamentally disorganised, it also shows people the very first steps they need to take to make their own braid at home.
I also pass around a few samples of fingerloop, especially as we are waiting for everyone to file into the room and sit down at the start. Don't have too many samples or people will insist on seeing every one, instead of making some themselves. You can make a set of samples available on a table and say that anyone who has time or wants a break during the lesson can see them then.
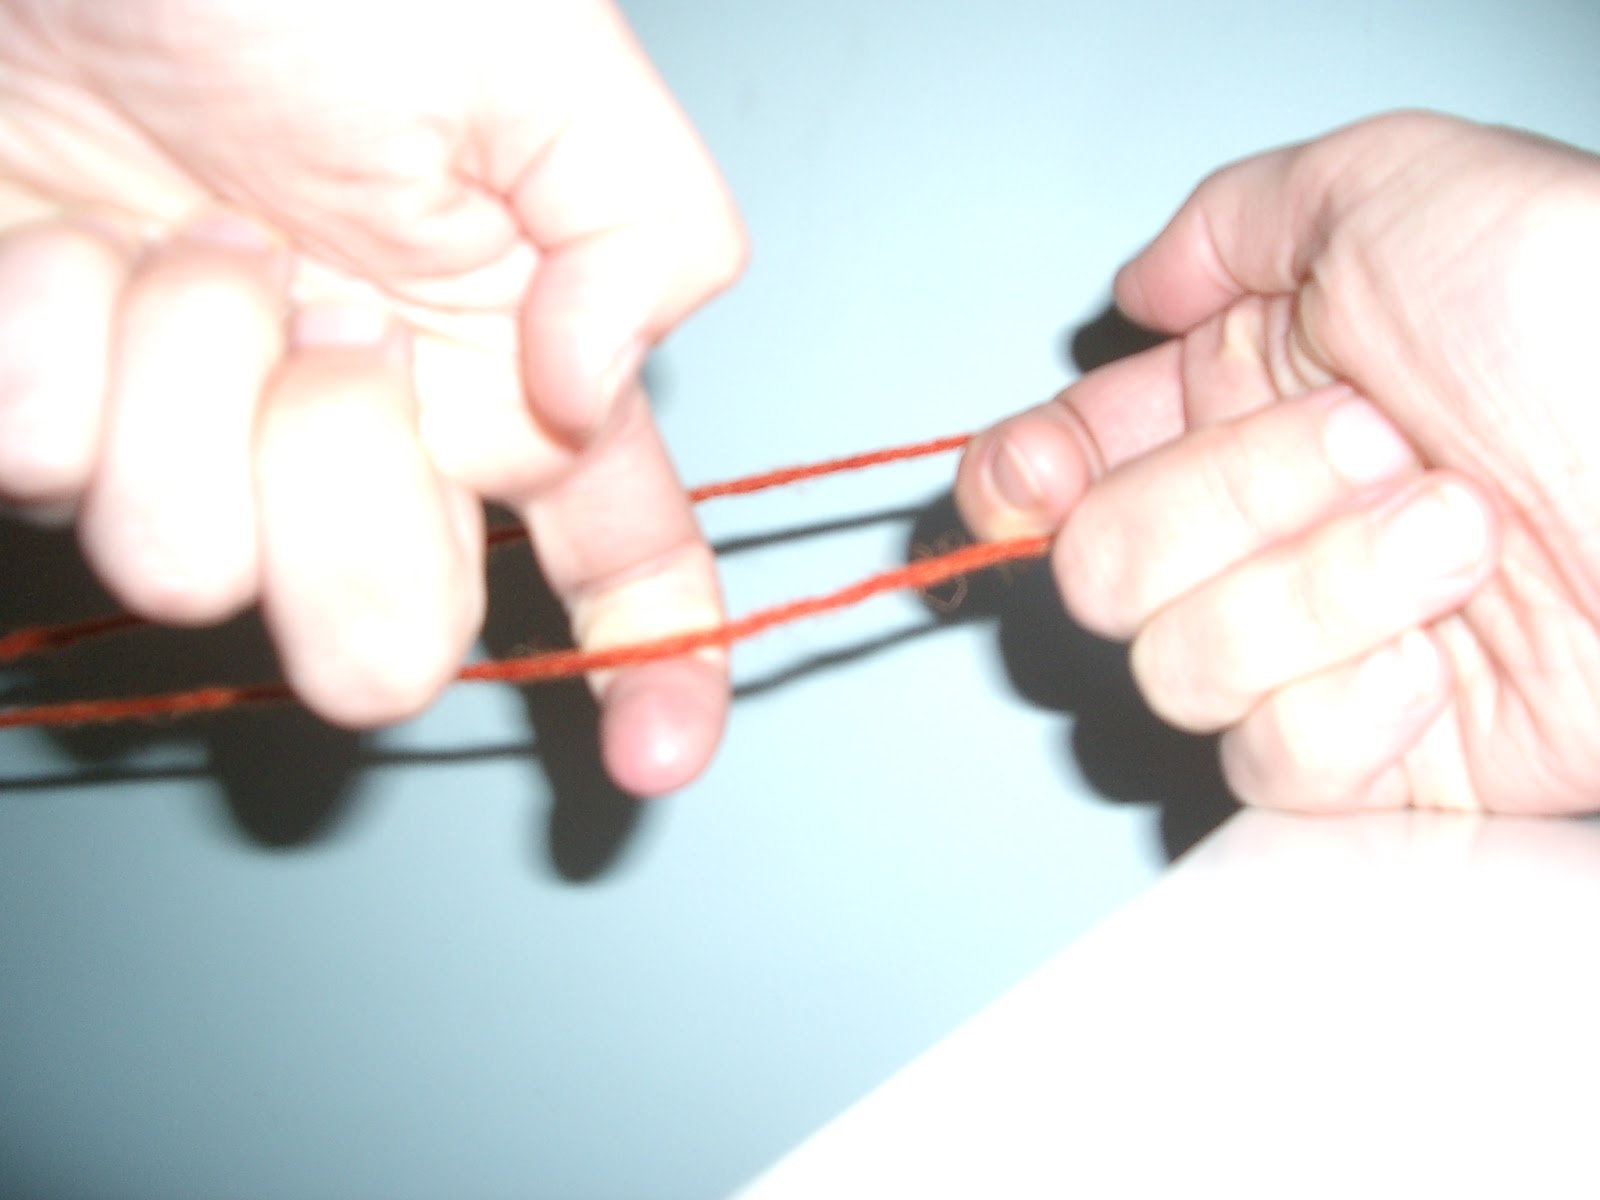
Then I demonstrate how to knot their string and tie it off to a immobile object with a lark's head knot. (possibly accompanied by a ramble about there being special ways to manage longer strings, but we aren't going to learn them today). I show them a bit of fingerloop so they can see the general motions, then point out the specific motions involved as 3 steps (walk the threads down, swap the loops, tension the piece, repeat) and repeat it several times then a few more. You may need to keep doing this for a few minutes so that different people can move to the front of the crowd to see what you are doing.
Now is a good time to remind everyone that this is a drop out when your brain is full or fingers is sore class. I've had a student who kept braiding until she had blisters on every finger that got huge and all popped, and was still braiding. So it really is important to point out that people need to stop when they are at the pre-blister stage. It's also good to remind people to practise this again within the next 2 days or they will forget how to do it. (this really does seem to hold true - I forgot how to braid after my first time). You may wish to offer to remind people and teach them a few extra tips later whenever they catch up to you.
Materials
I use fat crochet cotton. Silk was the main material used in period for braids, but this is expensive, difficult to obtain in thicker widths and cuts into the fingers more than cotton. Crochet cotton is smooth, non stretchy, non-slubby, readily available, relatively inexpensive and tough. All of these are great attributes in fingerloop braiding, and lack of these attributes can make learning more difficult than it needs to be for your students.
Don't let your students use their own materials (even if they are ones your more advanced skills can use) as you and they will have trouble distinguishing between flaws in their technique and flaws in the material. Using a readily available material makes it easy for your students to obtain more to practise with later. Thick crochet cotton makes individual strands easier to see, makes the braid work up quicker (leading to prouder students) and is less likely to snap.
I'm a bit of a scrooge. I find that asking for a silver coin donation for thread helps me overcome my miserly tendencies when people ask for extra thread - it helps me happily smile and offer them some to take home to practise on later. (And given how important that first practise is on this skill retention, this can be crucial)
Keep the threads fairly short - length from elbow to fingers or slightly shorter. Longer threads make it much harder for students to maintain tension, and lead to more mistakes, and more cases of loops falling off fingers. If a student cuts a longer string, make a knot at the desired starting length and thus discard the excess length. Cutting extra threads just means that students get more practice in tying up a new string. Let them know they can do a longer string later, but it really is important that they have optimal conditions so they have the highest likelihood of a successful positive outcome of their braiding.
I learnt a nifty trick from Mistress Rhiannon y Bwa, author of
the
fingerloop CA - don't try untangling your threads, just knot them, and begin above the tangles in class. People end up trying to untangle impossible tangles and waste a lot of class time (really, like 20 minutes!). Let people know not to detangle, just to chop that portion off, and they will get neater later, but meanwhile they can make the most of their tuition time.
Getting the students started
I like to simply let the students discover the 3 patterns that they can make with 5 loops by themselves. I get them to setup with 2 loops of one colour on one hand and 3 loops of the other colour on the other hand - this lets them track the first colour and loop change more easily, and makes sure everyone is doing the same set of coloured patterns. I show them a hand motion to make, and let them see which braid they make, then later when they are feeling confident I show them a variation on their hand motion, and they can see which other braids this makes. This gives the students the ability to repeat this process later to rediscover the braids. I find it is generally easier to teach through one finger braids before through two finger braids.
There are 3 easily obtained braids that can be made:
- half circular braid - Through middle finger/loop reversed or unreversed (there might be subtle differences between these two at very high tension and high skill, but I can't reliably pick them)
- square/circular braid - through two fingers/loops reversed
- two small plaits - through two fingers/loops unreversed (this is structurally identical to a 5 strand plait like you'd do in your hair)
Here they are in a table:
| reversed | unreversed |
| through 1 loop | half circular | half circular |
| through 2 loops | square | 2 plaits |
It's important to tell students that some of them will get different results using apparently the same hand motions - otherwise they can get quite concerned when their braid is not the same as their neighbours. In fact the first time I came across this in a student I was quite confused myself, which isn't very confidence inspiring in a teacher. It's also important to tell them that 2 plaits is one of the possibilities as otherwise more than half the students will assume they are doing something wrong. And generally won't want to bother the teacher until they've gotten frustrated that they can't 'fix' it. If you have the choice, I believe the order half circle, square, 2 plaits is the easiest order for most people to learn the braids in, but for people with a strong bias to reversed or unversed pickups a different order is likely easier.
Another question students will commonly ask is if it is important which of the two fingers the loop passes through. The conventional answer is the top finger, and this is much easier for the students to manipulate their fingers around, so I'd recommend it, but you might like to try the other so that you know the answer to this question.
As these are all 5 loop braids, student can learn new patterns on the same piece of string, and can switch as soon as they are confident and you can suggest a new variation. It is best however, to do at least 5cm of a pattern type, so there is a nice sample size of the braid type on the finished braid. Some students will require to braid a whole piece of string to simply understand the basic moves and learn how to adjust their tension. Others will be bored after 3cm of a pattern. Look at the student's work and judge how they are for yourself as well as asking how confident and adventurous they are feeling. Even if the student is confident and adventurous, if their tension or technique are so poor that you won't be able to tell a circular braid from a half circular braid, then they probably need a little more practise on a single braid and maybe a little more guidance or support.
Thoughts on choice of braids and teaching method
The fingerloop CA and several other fingerloop instruction sites generally give only one method of obtaining an unreversed or reversed loop. I've found about 1 in 15 people naturally use a different method. And I have no reason for thinking this method less correct, so instead I try to teach the different methods, and how they affect the band. I'll write about this separately soon, and think it's quite important to know this if you are teaching others, so those who use the different method can quickly adjust what they do. This is why I don't teach reversed or unreversed, but let students experiment with their results themselves.
While the 3 loop braid is the simplest fingerloop braid to teach (and one I'd recommend to teach to children and adults who are afraid fingerloop might be too difficult for them), I teach the 5 loop braids because I believe it is a good foundation to learn skills for the more complex braids. With a 5 loop braid, it is possible to go through two loops or one loop, while with a 3 loop braid only the simple through one loop reversed or unreversed combinations are possible (which increases the odds of starting with the more complex and confusing 2 plaits braid). With a 5 loop braid the student needs to learn to dexterously manipulate their fingers around the non active loops, to walk down the loops (not required in 3 loop), and to manage keeping the loops at the same length despite fingers of variable length. If the aim is to only produce a braid, a 3 loop braid is probably a good choice, by my aim is to produce a student who has enough fundamental skills that they can go away and learn a lot more from a book.
Exchange loops can be fairly simple to learn too, but they are less common in fingerloop - a person who knows exchange moves knows only how to do exchange moves, while a person who knows how to do regular fingerloop knows how to do everything except exchange moves. Also I believe the actual exchange move can be slightly trickier to teach to the majority of people. So I teach conventional fingerloop braids, but I think they win over exchange moves by only a small margin.
One thing I think I should be doing, which I am not yet, is providing a handout with track plans and recipes for the braids people produce so they can compare what they produce with how it looks in written instructions. This hopefully would give the students more of a foundation in reading how to do a braid from written instructions, enabling them to more easily learn other patterns from written instructions.
extension work
Forthose who are braiding very ably, the
flat string offers a very good choice to test those skills at reliably discerning reversed from unreversed. If the student has been making a good version of the 2 plaits, then they are able to reliably select the same finger movement, but most students will have a preferred movement of reversed or unreversed, so the flat string really tests their ability to do both, to keep track and to learn a two step braid.
Alternately, a 4 loop braid with
exchange moves makes a very pleasing pattern and is very simple to braid, for those students who take to fingerloop braiding well. (Encourage students to try both possible starting arrangements of 2 colours to get a spiral and a stripe).
For all students, braiding again before they've forgotten what they do with their fingers (generally 1-3 days) is very important.
Be sure to give students links to sources of more information.
Conclusions
I don't think I have a lot more to say, in fact I'm surprised I've talked as long as I have. You've seen what I do any hopefully why. Now decide how to teach your fingerloop class in your own way. You'll have a different personal style and different students with different needs, but perhaps the above will help you avoid some of the possible pitfalls of teaching fingerloop braiding.