Note: This has been sitting in the drafts folder waiting for me to tidy a few edges on it. Please read it as written about a 5 weeks ago.
It's time to stop musing over what could be and start sewing. My old court dresses are falling apart, and I've had fabric waiting for me for a couple of years now I think. (12th Night Coldstream I won it at). A lovely purple cotton with yellow flower motif at regular intervals. Not bad for a first draft, and purple is my favourite colour, one I regret is rather difficult to obtain cheap fabric for garb in. The fabric is only cm by cm, rather smaller than I usually use for a dress, but it should be enough for the tighter shorter Austrian styles I've been looking at.
I'm going to machine sew this garment because:
- it's cotton, not some particularly authentic fabric
- it's very stiff and not easy to pierce
- I want this finished for the bal d'Argent, which is real soon now.
After much musing, I produced a layout and cutting plan for my fabric:

The slant of the sleeves is exaggerated a bit here, and my sense of proportion isn't perfect, but the layout is more about making my cutting ideas easily apparent than a realistic representation, where smaller angles may be missed. Where distances haven't been marked on the cutting plan, assume symmetry of distances and angles. The gore width was based on what I could fit from the fabric. I haven't reproduced how to fit this on the fabric as no-one else will have the same size piece of fabric as me anyway. Just for future interest though, my fabric was 136x227cm, and I had about enough for 4 pouches spare (probably would have had less if not for overmeasuring a piece, then correcting.)

Sleeve head - I wanted to try some ideas from many of the albs I've seen - using slanted body panel pieces where the sleeves meet instead of gussets to give freedom of movement.
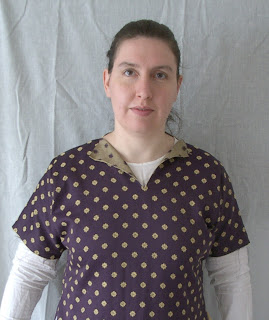
 Having cut out my shapes (and discovered I cut the lower sleeves wrong - the above is the corrected version), I wanted to check how it would work. I machine basted (tacked) together upper sleeves and body piece.
 I basted down each side from the top of the shoulder, and by this method the slant of the sleeves (which changes direction at the shoulder) wasn't too hard to sew neatly. Then I basted the sleeves closed with nice straight lines.
I tried this on, and thought it left too much bulk around the underarm. So I then turned the garment inside out and pinned on my body (then basted) a curving section out on the front of the vertical seam attaching sleeve to body panel. I didn't do the same on the back, to allow more room to move my arms.
Below is a comparison of the modified (left) and unmodified (right) sleeve heads. Yes, the difference is rather slight, but the modified sleeve feels less bulky too.


I like the more fitted version better, so that's what I'll use on the final product. There should be a little less bulk when I finish all the seams and trim the excess fabric and sewn the seams down flat.
Bicep
I also narrowed the width at the bicep - I want this relatively tight.


Now, only one easy way to test the dress - wear it.

3 comments:
Teffenia,
The fabric is very nice. I'd love to see an image of the full outfit when you wear it.
Cheers,
Jane
The full outfit is going to be quite a while. But I'm going to keep wearing it to events as I adjust the pattern and add decoration layer by layer.
You can see the general shape of the dress now in my next post. Not over a chemise though, just over my modern clothes (yes I wear floor length skirts frequently).
I really need a new slightly longer chemise too (oh for a bolt of cheap white linen). And a few accessories - hat, belt (repairing the one i have now), that sort of thing. Then I'll call it a full outfit.
Interesting post I enjoyed read this
Post a Comment