Showing posts with label clothing. Show all posts

Tuesday, 5 March 2013

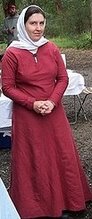
The world's simplest veil: headrails

Headrails

The simplest veil I know of is the headrail. Firstly it is simple to construct because it is quite simply a long rectangular piece of fabric. In fact a light pashmina scarf makes a great headrail, and requires no construction at all. I find my smallest one that works is 162cm long and a width of 60cm, but a little wider may be good (not too much -try for the distance from the front of your head over your head to your neck and a bit of spare), and any amount of excess length is fine - I have one which is over 2m long.

Secondly the headrail is simple because you don't need a fillet under it. This is a good veil for people who are scared of pins in their head, or claim they are too uncoordinated to get a veil on straight, especially at events where no large mirrors are handy. Thirdly the headrail is simple because there are only 2 steps to draping it.

I don't know where the name headrail comes from, but I expect it's a reenactor term. I think the 12th C person would have called it the local equivalent of veil, eg the anglo norman guimple or perhaps coife. I doubt the language would have had a specific word for this type of veil versus that one, but modernly we find it useful, especially when referring to 100's of years of veil types at the same time.

How to drape it

The first step is to place the centre of the veil on top of your head. It may be easier to drape it around your neck like a scarf, then pull it up onto the head.


In the picture I've deliberately made the two ends slightly uneven, so it drapes evenly. This really isn't necessary, nobody gets to see both ends at once. Next, grab one end, and toss it over your shoulder. It doesn't matter which side.


  And that simply, you have a headrail.
For tasks where the long headrail may drape into things in front of you, simply toss both ends over your shoulders. For even more demanding tasks, tie the ends in a simple single knot behind your back.


Comparison to other veils

While the simplest veil, the headrail isn't quite as versatile as other veils in this manner.  I do find myself adjusting it occasionally and it isn't well suited to tasks where I must bend over (it drops off forwards). If I sit in chairs with a back, the headrail also doesn't work as well because it relies on the weight of the fabric to hold the veil tight against my face.  Sitting in a chair takes the weight off the veil.  For the same reason, while I've seen little evidence for it being the way things were done in most places in the 12th Century, a beaded or heavy trim edging or fringe could really add weight to a headrail, making it stay on better.


Extant 12th C images

When I actually look for 12th C headrails, I actually find it difficult to prove such a veil was used. Here are some of the closest images I've found:


England, 1175-1200.
folios 11r, 12v and 15r


These images show an unusual amount of detail for the period - generally you can only see a white or whiteish veil wrapped around a head. But on these examples you can clearly see the veil crosses over itself at the neck. There are a few other examples which do show the crossing of layers of the veil, and many which do not.

But I'm not at all sure what shape of veil is depicted here - we can clearly see a corner on the first image, but that could for example be the corner of a half circle veil as the corner of a rectangular veil. So we must guess based on the shape produced by comparing to our results and hoping that the artist was actually trying for a realistic impression. Whatever shape the veil, both ends are flipped back over the shoulder in all but the first image. And the ends depicted are fairly short - whereas my ends are fairly long to keep this veil closed by itself.

In all but the first image, no hair is visible under the veil - I find this very difficult to achieve with a headrail alone - I generally either need veil pins or an extra layer underneath to cover the forehead, or otherwise my veil creeps backwards on my head.

Overall, I think the headrail is a quick and easy way to introduce people to veils, but I'm not convinced that this is exactly how a veil would be worn. But it does teach about what fabric drapes well, is easy to put people (even if afraid of pins), and teaches them how to flip the ends over their neck - so I think it serves a useful purpose. And it may be right for other time periods.

Wednesday, 13 February 2013

Blue wool cote II: Revenge of the fabric


I've written about the plans I had for constructing my blue wool cote earlier. And just as I had written, I constructed the garment. And it was a good fit, and comfortable. And the wool was flowier than the linen. And the wool was warmer than the linen when it was cold, and not much warmer when it was hot. And I forgot to take any photos of it. From my memory, the only difficulty I had was the seams were a little more difficult to sew than regular seams because I was always working in the middle of the fabric, and because the fabric was so thin.

But alas very quickly my choice of fabric let me down. I had chosen a thin wool suiting, and the fabric manufacturer had decided to make the fabric modern by doing something to stop it fulling (making it machine washable). I don't know if it was  treatment or if they chose worsted wool or something else, but the wool frayed, and refuse to full (felt) even with warm water and soap. And it frayed more, and I was in deathly fear that all my seams would fray out and my dress fall to pieces.  Possibly in embarrassing ways. So with tears in my eyes for all the effort I'd spent constructing the dress, I set about systematically resewing each and every seam on the garment (well maybe not the entirety of all hems). I tried to maintain the effect of the original stitching, by tucking in the edge of the fabric and then sewing both seams together in the same manner as the original seams, but now with no exposed edges.

Here's how the seams looked after resewing::


 This worked well, the seams years later are still not fraying, and I still maintain the original magnificent effect of the white thread on dark blue fabric, but without the fraying. And I only had to resew the entire garment (I'm not bitter :-) ).

I still forgot to take photos of the entire garment at this stage, but I do have some photos of details which have not changed, so let's take a closer look at some of the features of the garment:

neckline detail - this was bound with a piece of straight grain tape made from the same fabric


 gusset detail - see how interesting the white linen on blue dress looks


arm detail - see how the extra length ruches (gathers) up about the wrist


front of centre gore -I decided to play with the gore insertion, gathering the gores into the body pieces slightly. This was inspired by the gathering seen in side seams of 12th C garments and a half remembered reenactor's late period gathered garment. I have little evidence for centre gores at all, let alone gathered in ones, so this was mostly an excuse to explore garment cut than a serious conjecture about how centre gores might be finished (side gores are a different matter).

back of the seam showing the reinforcing piece I sewed on to strengthen the pleating. This piece doesn't really support the garment, but it protects the back of the pleats from rubbing, and the edges of the pleats from fraying. I have only half garbled inspiration for such a construction, but I did need to protect the frayable edges of my fabric.

You might be wondering why I don't have any photos of the garment at this stage- wasn't it finished this time? Alas no, the seams were working great, but there was one problem with resewing the entire garment (other than having to resew it), which was my seam allowances were now much larger than they were before, and consequently the width of my pieces became narrower. What was once a casual comfortable garment was now tight across the chest and upper body. But it wasn't tight like my side laced garments, it was too tight for a loose garment, but not as tight as a tight garment - the worst of both worlds. So more changes were afoot, which I'll write about in the next episode of the saga.

Tuesday, 11 December 2012

When is a white dress not a white dress?

When is a white dress not a white dress? When it's a chemise!


 "Life of St Cuthbert" (British Library Add MS 39943, last quarter of the 12th century).

Above is shown the only illustration of a women’s undergarment that I've seen in many, many illustrations (this was found by David Rayner). We can't be sure this is not a dress, but it seems probable. The features of this garment are consistent with the features of the garment worn under a dress in illustrations - tight slightly wrinkled sleeves to the wrist, folds of garment at the feet, a keyhole neckline tight about the neck.

The garment appears to be a tunic, tightly fitted to the forearms, looser on the upper arms and body, with a keyhole neckline. This gives us a general layout for a women’s chemise, (although a noble ladies chemise may differ a little from a nuns), but does not give us any construction details.

Unfortunately no female 12th century garments exist, and Romanesque artwork glosses over fine details such as seams. Seeing that this differs little in shape (only length) from male garments, we must turn to them for details. The extant men’s garments are mostly clerical garments, but are expected to differ in only small details of construction from secular garments. Indeed a great many clerical albs feature sleeves which are much tighter in the lower arm than upper arm, very full of skirt, and the sleeve length and garment length are often much greater than seems practical for a human body. Keyhole necklines exist, but other forms of neckline are very common. There seem to be a great many parallels between those garments and this illustration, so this does suggest that albs are a suitable source of inspiration for chemises, if used with care.

One final thing this illustration has taught me concerns kilting up the skirts of a chemise. I've tried kilting up the skirts of my longest chemise at the waist. It's a quite effective way of shortening a chemise. I put on a belt, then pull a large fold of the chemise over the belt. I then get a friend to help pull the chemise down to my desired length. The chemise can be ankle of floor length, longer in back, whatever length I want.  It seldom falls down, only under duress of the most vigorous dancing. I find this an extremely practical way to adjust my chemise length. The only requirement is that there is enough fabric to fold up, ie that the chemise is at least say 10cm longer than the longest belted length you want it to be.  The only inconvenience of this technique is an added bulge at the hips caused by the chemise - if the garment worm over the chemise isn't kilted itself, this can look a little silly to modern eyes. My looser Austrian dress is not so tight that this is a problem, and stiff enough to ignore such effects though, so it works perfectly with this technique.

Sunday, 26 August 2012

Red linen cote redux and musings on handsewing your first garment

I've written about my first completely handsewn garment before, a linen cote I made. but I find I have a few more things to say about the garment.

The first thing I'd like to talk about is my motivation for handsewing the garment. I can remember it because I was going to pennsic in 2003 and wanted to sew the dress on the 24 hour plane ride. I don't think I finished the garment in time to wear it at pennsic (although I got plenty of sewing done on the plane), but I think it was probably finished before the start of 2004. It really helped to have a lot of time set aside for sewing the garment and a reason to be handsewing it, as otherwise i probably would never have finished it by hand.  These days my sewing is much quicker and I can sew without a lot of concentration, so sewing is a nice braindead way of keeping my hands busy, so I easily complete garments rapidly, but I remember this first garment took a lot longer, more concentration and a lot more effort to finish.

The garment also almost caused more tears than my subsequent handsewn garments. When constructing the garment, I had finished nearly all the seams on the garment when I discovered the gores were inserted too low in the garment to comfortably expand over my hips. It was a moment of much despair, for handsewing was a very long and slow process at that stage still. Eventually I decided if I undid the shoulder seams and removed the sleeves and reinserted them lover and shortened the shoulders in order to avoid undoing the very long seams on the gores. This made the dress a tweak shorter than I'd planned (I had cut it to floor length so I could choose any length I'd wanted), but actually was a very practical length. So my first advice to anyone wanting to handsew a garment - make a (wearable) mockup by machine first.

Another piece of advice for the would be first time sewwer is to invest in the best quality fabric you can buy. At the time I couldn't find affordable wool (I was a poor uni student, and I didn't know where the best bargains on wool were to be found), and I wanted something thinner for hot days. However the fabric choice has been the garment's weakest point - as well as being unable to clearly document coloured linen for the 12th Century, the fabric is quite weak after repeated washings (it can't be beaten clean or effectively spot cleaned like wool) and the fabric is quite literally falling to pieces in many places. This dress is soon to be for the rag pile.  But more significantly, the fabric wasn't as easy to sew as my later constructions in thicker ramie and wool. Thinner more loosely woven weaker fabric means the fabric doesn't grip the thread as well, is more likely to get holes when you make mistakes or unpick too often and just to not feel as good to sew.  It's a subjective thing, but I've sewn this fabric since, and it wasn't just my novice sewing skills that made this difficult.

The garment is intended to be a 12th C cote - a day garment, practical to wear but with still some stylish features like very tight sleeves and fairly tight torso. I'm very happy with the cut of this garment. It's a nice conjecturally period cut and very comfortable to wear. The only debatable feature is the highly sloped shoulder seams. Many medieval garments have no shoulder seam at all, and thus are of course not slanted at all. My shoulders are quite slanted though, so this does improve the fit (the slant was fitted to my shoulders).

One of the things I like about this garment is the neckline. It's a nice tight neckline, allowing minimal sunburn, sitting nicely, just like in the manuscripts. To achieve this I shaped the neckline to my neck rather than predrawing a larger neckhole. I'll write about my neckline method someday soon. I also shaped the sleeves in a similar manner - fitting them from a basic rectangular shape to my arms, rather than a measured out shape. I think both of these worked very well indeed, and continue to use these methods.

This dress has served me well, and will be replaced by a very similar garment very soon now. In fact the blue lightweight wool cote was planned to be a replacement for this dress, but circumstance is dictating otherwise.

Wednesday, 15 August 2012

Hairstyles and veils

Today, an intorduction to veils.  Yes, I know others have posted similar descriptions, but most use a band under the chin (which doesn't suit  a number of 12th Century styles) or aim at a different style, so here's how I make my simplest style of veil. Of course many variants exist, and I'll attempt to explain some of the ones I use later, but don't be afraid to experiment - If it's giving you the look you see in the illustrations, you are probably heading in the right direction.


The fillet
Veils don't just stay on by magic. And if you just jam a crown or circlet on your head on top of your veil, you run the risk of getting the dreaded muffin head effect. In fact, there are plenty of veils in manuscripts that don't have a circlet on top of them, so something else must be holding them up. My favourite way to do so is a fillet.

A fillet is a strip of fabric a bit bigger than the size of your head. Good fillets are made from fabric that will grip a little. For example a shiny satin ribbon works badly, slipping off easily. A velvet ribbon works a bit better because its pile grips the veil better. But those are both modern examples of materials. Period examples are likely to be linen bands or strips of tabletweaving or similar woven narrowwares. I have both and both work quite well.

Here's pictures of attaching the fillet:

The tabletwoven strip I prefer to tie behind my head, while the linen bands don't tie very comfortably or securely - I prefer to pin those tightly to itself at the back of my head.


Once the fillet is sitting on your head, you can now attach the veil. I'm using a simple oval veil today, but this method should work for most other vaugely cirular shapes of veils. Drape the veil over the fillet in the position you want it to be in.

Pop in a pin in the centre, that is above your nose

Add a pin on each temple.
And so the final product which drapes, but doesn't fall off your head when you dance. You can place a another fillet over top of this again, be it a simple metal circlet, a wreath of flowers, a cloth band or a crown. I'm told the underneath fillet will support the weight of a crown a bit, although I can't speak from personal experience.

Tuesday, 13 March 2012

10 medieval ways to stay warm with an old woolen blanket

So today's article is derived from years of telling collegians that they can be warm, dry and medieval cheaply and in a medieval way.  But I think these tips are of far wider usefulness, so I share them here today.

Why wool?
Wool is a good insulator, keeping you warmer than other plant based materials (cotton, linen, ramie) or synthetic materials.  Wool will also keep you warmer even when wet, and as a bonus it is also fire retardant.  More of the wonderful properties of wool and the reasons behind them are explained in an article by Ásfríðr Ulfvíðardóttir in the newest edition of the Known World Handbook. Wool was the medieval fabric of choice for outerwear for good reason because of all of these properties.

If you are allergic to wool, it may be worth investigating other protein based fibres, as these are likely to be warm for similar reasons - cashmere from goat or rabbit (beware many things labelled cashmere may actually be wool), alpaca fibre, or more exotic fibres such as camel or dog. Silk as a sort of protein fibre (moth cocoons) is definitely warmer than plant fibres. If it was spinnable and collectable, it generally was spun and used for something in medieval times - there are a few examples of exotic fibres such as camel and goat in extant artifacts.


Why an old blanket?
Blankets are a cheap source of sufficient quantities of thick wool to keep you warm. Blankets are generally sturdy, thick, warm, large, and often prepared in ways that resist fraying, all of which are great attributes in medieval outerwear. Single bed and double bed blankets are large enough to make a wide variety of covering garments. Old blankets are great because they are relatively cheap and you won't be worried about dragging it on the ground, poking holes in it, having sparks burn small holes in it, or chopping it up. Old wool blankets are also relatively easily to obtain:  See your local op/thrift/secondhand shop for cheap blankets - look for plain colours that aren't fluorescent.  In Melbourne, expect to pay $10-$20 per blanket (expect to work around some holes at the cheapest end of the range), and we aware that the salvos have a better range, but rarely have the best bargains.


What are the 10 ways you speak of?
These methods of using an old blanket are presented in rough order of increasing sewing skills required to utilise them.

1) Put it on your bed
Medieval peasants weren't silly. Going to bed when it gets dark also means you are in your bed in the coldest part of the night, conserving your warmth in a cocoon of bedding rather than expending energy to stay warm.  Wool blankets are good bedding for all the reasons presented above. Down is too, but synthetics seldom are as good.  It's important to note that wool takes a few moments to warm up - your body heat warms it up - use a heated object to heat your bed (brick in a towel or hot water bottle, or another person) or go to bed before you get cold to best utilise the insulating properties of your wool.

This trick can also be used after you turn your woolen blanket into garments - they can be piled on your bed to keep you warm too.  This also saves a lot of storage space for bulky garments. 

2) Put it over your bed
Old 4 poster beds were a very sensible invention - even as you breathe or lie still you loose a lot of heat. Enclosing the space around your bed not only prevents drafts, but will eventually warm up as you breathe into it. Using an good insulator such a wool to enclose the space will mean you loose less of the heat than you would with other materials.  Bed hangings don't have to be elaborate - they can just be cloth draped from a point (think mosquito net) or a blanket draped over a rail.

3) Pop it on your lap
I get coldest when sitting still. Keep a small blanket on your chair to drape over your lap when immobile, and leaving it on your chair when doing things allows a method of quick and easy temperature regulation. I find a draped blanket much easier to deploy than putting on and off extra layers of clothing.

4) Wrap it around you
I'm not joking,  I utilise this often when I am doing fairly sedentary activities.  

My favourite way to wrap my wool blanket (for me a right hander) is thuswise: start by tucking an end under your lowered left arm, and hold it in place my clamping upper arm tightly to your side. Wrap the rest of the blanket across your front, under your right arm, across the back. Gradually slant the blanket upwards as you cross the back, and end by draping the remaining blanket over your left shoulder and sort of gather any excess fabric up draped over your left arm. Your blanket needs to be cut to a width of armpit to above floor and length I'd say less than twice you hip measurement.  A wider blanket can have the top edge folded inwards to the deired dimension before you start wrapping, and a much longer blanket might wrap around the body twice.

This wrapping leaves my left arm fairly immobile (with practise you can do simple tasks with the lower arm without moving the upper arm), but your dominant right arm free to do stuff. It's not suited to active pursuits, but you can do a surprising number of things that you might do at night in this wrap - walk talk, drink, sing, etc. 
  
Other ways of wrapping a blanket also exist, but I can't personally attest to them. There are many pictures of medieval people wearing draperies, however it's difficult to tell how many are simply archaic images of biblical figures and how many are realistic depictions, but this can work.

If it drizzles or gets colder, reach behind your neck and pull the fabric over your head, and you will have a rudimentary hood. It's better than nothing, but it does tend to fall down.

 5) Pin it closed as a cloak
It is generally stated that anglo-saxon cloaks were rectangular.  personally I think many of the artwork examples people use from late in the period actually show semi circular cloaks, but I think something as useful and simple as the rectangular cloak would have existed earlier in the period. Anyway, its a really simple way to fasten a cloak.

Simply pin two corners of the cloak together and then put your head through the hole created.  rearrange the pin to over your right shoulder if you are fighting or doing a lot of stuff with your right arm only, or to centre front otherwise so you can use both arms.

If you are a early period Scandinavian noblewoman, you might consider wearing your rectangular or square piece of fabric as a shawl too.

6) Poncho
One quite conjectural methods of making a cloak is to start with a square and cut a hole in the centre of it and wear it as a poncho.  This comes quite close to some period illustrations in all but the finer details. It's so beautifully simple with so little sewing, I just had to mention this as an option.

7) Half circle cloak
One of the most popular varieties of shaped cloaks was  the half circle cloak. Versions of this cloak exist from pre-medieval to post Renaissance periods.  As the name suggests, the cloak is simply the shape of half a circle, occasionally adding some difference in cutting at the collar, and varying greatly in length depending upon time, place, gender, rank and use.

To make a simple half circle cloak, simply cut out the shape of a half circle to your desired length. I suggest looking at pictures of your desired time period to determine this, although you could choose based on warmth vs practicality or based on the length of your fabric. If you are lucky, or your blanket very large (or you very small), your half circle may fit within your blanket.  Otherwise you may be able to cut two 1/4 circles from diagonally opposite corners of the blanket and sew them together to make a half circle. For even narrower but long fabric, a cutting pattern method based on strips of fabric may be used, but this tends to be more useful for fabric on the bolt than blankets.

Pin or fasten with clips or strings your half circle cloak over the right should or at the bust, and it should work well for you.


8) A hood
You loose a lot of heat through your head. Once you have a cloak, often a second cloak will not make a big difference to warmth, but a hood will keep those bits of you which aren't covered by the cloak warm.  And what better than nice warm water resistant blanket fabric to make your hood from. Many patterns are available to assist with this. 

9) A chape
A chape is a 12th century term for a hooded cloak. My interpretation of a 12th century version of this is to make a hood which instead of stopping at your shoulders, continues flaring outwards until it's desired length.  I find this a very practical garment, great at keeping the rain off me.

10) A nice thick tunic
Most medieval tunics would have been made of wool. However big bulky woolen tunics can be awkward for everyday life.  But I find them invaluable to slip on over another woolen tunic when it gets cold.  Bulky a tunic made from a blanket may be, but it can be a lot less awkward than a cloak which drops in your food, slips into your water and makes it awkward to carry things, as well as slipping open and letting a breeze in.

I can make a simple small women's dress from a single bed blanket, a short men's tunic, no matter how broad, should also be achievable. I expect very few people would be unable to make a simple tunic garment from a double bed blanket.

In some time periods tunics can also be hooded and/or  have removable sleeves (see for example gardecorps) or can have sleeves that drape over your hands, all of which are great ways of keeping you even warmer than a standard tunic.

11) Hose
 Just because you kept reading, I've added a bonus 11th use.  If you find a particularly thin blanket, you can chop it up to make hose (medieval stockings). You loose heat from all over your body, so hose can be more useful in keeping you warm than a third cloak as they cover a part of you that wasn't well insulated. Many patterns for various medieval hose are available. Similarly, fabric mittens, hoods and a variety of other accessories should be achievable with scraps of your woolen fabric.

Monday, 27 April 2009

Past constructions I: red linen cote

This series of posts exists to record some of the cutting plans I have used for tunics in the past, and to save their dimensions for future use. It's mainly for me so I don't have to keep remeasuring and guessing, but you may find this useful to work out your own cutting plans, especially if you are a local who has tried on any of my tunics and can compare the fit.

My dark red (maybe even burgandy) linen cote was my first completely handsewn garment. The fabric was a thin (shirtweight) fairly evenly, but not very tightly woven fabric, which all my tests diagnosed as linen. As it was a bargain buy without labels, I'll never be able to be quite sure if my identification was correct. The fabric was a little thin for a dress, but it was cheap, available and not cotton. And I was having to wear garb on 40C days occasionally.


The thread was ordinary sewing thread - gutterman's polycotton machine thread. In retrospect this wasn't a good choice. The thread slips easily through the linen, possibly even cutting into it a little. Seams in running stitch on this garment form gaps easily, and even backstitch forms gaps easily. I don't think this was a problem with my sewing, as this happens on all the seams on the garment, but was instantly fixed when I made the next garment with linen thread that grips the fabric just a little. I also regret the choice to use black thread. It would have been difficult to dye any thread this black, and most linen thread would have been undyed I believe.

Seams were constructed by sewing running or backstitch and then flattening the seam allowance (with cut edge folded under) to both sides of the seam and sewing it down with running stitch . I didn't know that stronger and more period methods such as flat-felling to the same side existed when I did this. Again I'd fallen for the myth that this seam style, known from the back of a pair of London hose, was a common style.

The cutting plan used for this garment used simple rectangles and triangles as are seen in various period tunics. This garment was tighter on the body to follow the fashion for tightly fitted garments in the 12th C.


The garment ended up a little shorter than I had planned, because after sewing everything together, I discovered the gores started too low down the body. I ended up unpicking the sleeves and taking up the shoulders (by about 5cm?) to fix this, because I couldn't face unpicking and resewing all those long skirt seams. Originally the whole body (front and back) was one long piece, and the shoulder seams were flat.

The centre gore was not very easy to insert neatly, and I'm still not very fond of the look of centre gores. This was the last time I bothered inserting center gores for several garments, as side gores are so much simpler.

Originally I inserted fichets in the side seams of this dress so I could conceal a pouch beneath my skirts. I'd noticed very few pouches shown in pictures, and posited that a concealed pouch could explain this. Unlike the later garments I'd copied the fichets from, my fichets were very much to the side of the garment as they were placed in a seam rather than cut holes in the fabric (something I'm still scared of), and there were very few seams to choose from in my garment. My fichets were thus a little less practical than they might have been, but still worked fine.

However, having a pouch tangling in my skirts was a bother when dancing, and having a
gap through which my chemise showed was most improper.
That's not me acting strangely, the photographer has caught me mid galliard, and you can see my fichet quite clearly. Here's a photo showing that the fichet showed even when posed quite sedately:
Eventually I sewed up the fichets because I wasn't really using them anymore. I think having a fichet on the main dress layer, rather than an extra (overcoat equivalent) layer worn outdoors was silly, as my chemise showed, and a medieval lady would be more likely to carry a pouch outdoor than indoors when dancing. Unfortunately my mild climate seldom allows me the chance to wear an extra layer outdoors in summer.

Here's a shot with the simple yet elegant keyhole neckline showing clearly:
I normally fasten the neckline with a penannular or disc broach, but it sits quite happily and decently without one.

And a photo of the tunic laid flat - see how there really are no cures in the design, yet it does curve to the body. I really like the cut of this garment for an everyday garment.

Overall, this garment has served it's purpose very well indeed. This garment is so practical and comfortable that it has had 3 times the wear of any of my other dresses. It packs up small, washes easily, is cool in summer and hides wine stains quite well. (I don't drink wine that often, but I seem to always manage to spill some on me, even if it's only the sauce on the pears)

The only thing that I regret on this garment is the fabric and the seam finishing treatments. The linen is a bit more drab than wool or silk, not easily doccumentable (as a coloured fabric), a little cold when wet, it just doesn't have good drape, and the fabric is so weak that it will tear into rags soon. And thus was hatched my plan to make a really thin woolen dress cut to this pattern to replace this garment.


Wednesday, 21 January 2009

peasant shoes II - peasant shoes for royals too! part 1

[pushed out early - please check in a week or two for updates]

While I was making the previous two prototypes I noticed this picture:


I have shown this before, but hadn't thought about how they were constructed.

So I tried to make my own copy:

I made these the same as the previous pair of peasant shoes, but with an initial higher cut at the ankle, which I then cut into tabs. There were less gathers at the front, due to the way the tabs pull. It might even be possible to remove the gathers completely for someone with a narrower foot than mine.

It wasn't much harder to make than the last pair, and looks more interesting. I didn't end up with an exact copy because I was working from memory and put too many tabs in.

Here's the pattern laid flat:


This didn't really look like the picture unfortunately. And something was not quite right to my mind about the fit of these too - there were stress lines the at ran along a diagonal over the outside of the heel. I began to wonder if instead of drawing on the curving tabs, I should just be making slashes, and letting them become their own tabs on my foot.

And then I found this, lurking in an article I'd looked at before and put away:

An extant shoe made in one piece! And one that looked quite similar to the ones I'd been making.

The Article: Gall, Günter. "Die Krönungsschule der deutschen Kaiser." Waffen- und Kostümkunde 15 (1973): p1-24

The caption to the above diagram says:
Die Schnittmuster für die Sandalia des 12. Jahrhundert, die aus einem Stück Brokat, wohl mit unterlegtem Leder, geschnitten wurde. Die Konstruktion dieser Sandalia zeigt die Nähte auf dem Rist und an der Ferse, die durch die Goldborte verdeckt wurden.

Roughly translated by me (corrections welcome) that is:
"Cutting diagram for the 12th Century sandals, from one piece of brocade, probably cut in one piece with the underlying leather. The construction of these sandals shows the stitches on the instep and heel, that were concealed with gold bands." (Note- I believe this should read vamp, instead of instep.)

The article talks about these shoes and 2 other existing and many post medieval lost pairs, one of which is the more famous "shoes of ". It notes that on this pair the gold bands are used to conceal the seams, but the other two pairs are made in a different fashion (a 2 piece construction similar to ordinary turnshoes of the day I believe), but still use this decoration placement. The article contains few details of the construction, but talks extensively regarding the historical provenance of the shoes. There are probably many more details I am missing in the translation.

I then enlarged the cutting diagram shown above to the width of my foot at the instep, and made a mock up shoe out of felt from this tracing.

[picture to be added]

Unsurprisingly, the shoe is too long for me - I do have wide toes, a narrow heel and high insteps, that mean few modern shoes fit well.

I decided to make a version that fitted my foot's peculiarities, adapting the above pattern to my measurements.
A few adjustments and I had a shape I was happy with.

[picture to be added]

The next step will be to make a version in leather an brocade fabric, but that will be in the next episode I think. Just a warning - this project is being nudged aside by other projects that are more wearable at the event's I'm attending soon, so it might be a while to wait.

Tuesday, 13 January 2009

A Chemise for the Austrian Dresses III - Construction underway

Well, everything was going so well with the new chemise. I've started sewing and my seams are much narrower than last time I sewed a chemise.


And my sewing is happening really fast. I'd forgotten how fast I could sew, since my last few projects have all experimented with tricky materials, curving seams, new seam types, or have used new cutting diagrams and a lot of picking.

And then tragedy struck. I'd been carrying my chemise bits in a bag to work and back, sewing on the train. And somewhere the gussets fell out and didn't get picked up again. And I don't have any more of this fabric. Thankfully my sleeves are so long that I can easily shorten them by a gusset length.

Here's the sizes of my pieces now:


And now back to construction. Maybe I can finish it within the week!

full length hose

We're revisiting my 2008 creations here - I'm determined to get all my 2008 making things projects (the research projects will take too long) recorded before we get too far into 2009.

Here's my first foray into full length hose:


The fabric is linen, as is the thread (cheaper than wool, and friendlier on the thighs). The pattern for the bottom half is the same I've used previously, while the upper half is an attempted extension of this. seams are run and fell over the whole hose, since I can't work out just why the london hose open the back seam on their hose yet. It's weaker, I guess it could be more elastic, but is that really needed? The top of the hose fabric is turned over and a line of backstitch located about 3mm from the top edge to provide stiffness and reinforcement. The edge of the fabric turned over at the top is turned under and whipstiched to the rear of the inside. I have no historical justification for doing this, but it seems right given I'm not strengthening the portion by

This pair turned out fairly well for a prototype. The legs are possibly a little short, and maybe a little tight at the back of the knee. I discovered why so many period examples have a particular type of join at the top of the leg when my pattern exceeded the width of my fabric. This strange curving shape is in fact the straight line where a bias cut pattern meets the edge of the fabric at 45degrees. Here's another example in linen, although the seam is seems to be on the wrong side. I remember at least one more example in the latest patterns of fashion book. I wish I had used such a seam to give me extra room in these hose, but I'm reluctant to unpick a finished article.

I think the tightness at the back of the knee problem relates to me making this section moderately tightly fitted like the rest of the hose - I think this may be one of the places where a bit more looseness is needed. Experimentation with more wear and on later models will tell.

The top of the hose has an eyelet bound in buttonhole stitch, from which I used ribbon (a temporary measure) suspended from a band of ribbon at the waist. This mostly worked, which is surprising since I expected to need proper braes to make the suspension work properly. I don't think these hose will get a lot of wear until I have braes though.

That's about all I can think to say about these hose for now. In the interests of discretion, I'm not providing photos of me wearing them until I have braes.

Monday, 12 January 2009

Blue Wool Cote I: cutting plans

The most frequently worn item in my wardrobe is my red linen cote. It's very practical, easy to move about in, quick to slip on, and I can even slip it over modern clothes. It's also quite cool, which helps on our hot days, and is easily worn under my thicker wool garments on the colder days. In fact it makes life easier to have a dress under garments such as my thick burgandy wool dress, since if I get warm I can remove the wool dress and still be respectably dressed.

I have two main problems with this dress. Firstly it's made from coloured linen, and I'm fairly confident that coloured linen was not at all common in the era I try to portray, especially not in garment which would need more cleaning. There are references to the white chainse, a form of linen dress in the 12th C, but the very fact that this linen garment is synonymus with the colour white makes me think coloured linens were unusual, and generally not worth the effort for clothing. The linen doesn't flow on the body like my wool dresses do (the aforementioned chainse incorporates pleats for a non-flowing look), and the colour is fading, and when the day cools down, or the garment gets wet, it's so much colder than wool.

The second problem is simply that the garment is getting old and wearing out. I made it in 2003, and wear it at least one day a month, often more. It gets washed at least 4 times a year. Servants were given one new set of clothing per year, so I guess this is a guide to how long a garment might be expected to last. My garment hasn't but it is getting laundered more than I'm sure most medieval garments do, and it is made from a noticeably thinner and weaker weight of linen than I would expect most medieval people to have had access to. The garment is pulling out fabric around stitches, developing wear patches and similar. While the points that are wearing out first do reflect weaknesses in my sewing a tailoring technique, the cloth of the whole garment is on the verge of unravelling.

Well the solution has been at hand for a while, I've had a nice bargain buy piece of navy wool suiting waiting in my stash for me to be ready to cut it up. It's a lovely thin suiting, so It should be nearly as cool as the linen on the hot days. (Well the navy colour may be a mistake if I'm in the sun, but as long as I stay in the shade it should be good). My inspiration to make this the time to cut up the fabric was two-fold - I'm going to canterbury faire, and want to look my best (and have clothing that reflects the state of my knowledge today, not 5 years ago) when I meet a lot of new people, and I'd just read a lovely ladies description of a 13th C dress, and detailed answers to my questions regarding seam treatments and this seemed the perfect place to try them out.

So this is the general shape I decided on:


It's a general shape that seems to be in line with what we know of 12th C tailoring. It doesn't incorporate any of the fancy features of bliauts, and it is very tight about the body, unlike the 13th Century fashions. In fact I may have made it a little too tight in the body compared to historical reality (although with so little in the way of extant female garments you'll find it difficult to prove me right or wrong), but let's just call me a fashionable young girl. I'm not going to try and explore proto set-in sleeves in this garment - being a cote, it is more likely to have been of a simpler older-fashioned cut with less technological innovations than the bliauts.

It's basically the same lines I used on my red linen and burgandy wool tunics, but with the following alterations:

  • the seam allowances will be smaller in line with the different sewing technique
  • the dress will be a little longer than the red linen dress - the dress was always intended to be longer, but I made an error in placement of the gores and was too heartbroken to resew everthing, so I moved the sleeves down and resewed the shoulder seam lower, thus reducing the whole height
  • the dress will have slightly longer sleeves. I would like to play with the concept of rucked up sleeves on an ovegarment, and if I don't like them, I can easily shorten the sleeves.
  • the dress will be slightly narrower in the body. I want to see how tight I can make the garment (in line with 12th C fashion), before lacing is required. If I can't pull this on easily then I will lace the sides.
And here are the pieces I need to cut out with measurements incorporating those changes:
And here's the way it fitted on the fabric (wastage/scrap in pale blue):

The exact length of the sleeves and width of the gores was determined by the fabric width. Likewise the choice to have a shoulder seam or continuous fabric was make by the fabric (too short, but wide).

Sunday, 11 January 2009

A Chemise for the Austrian Dresses II - revised cutting plan

Well my plans have hit their first hitch. I conducted burn and other tests on my suspected linens, and I'm not really sure what the larger piece is, but I'm no longer sure it's linen. The smaller piece though, that at least behaves more like linen, though in my more skeptical moments I'm not sure it's pure linen either.

The smaller piece is 4m long, but it's only 112cm wide, so it's just enough to cut out a chemise. But if I use a trapezoid shape for each piece that is originally a rectangle, I gain only the width of the rectangle added to the circumference of the chemise, while with triangular gores, I gain nearly twice the width of the rectangle, as the rectangle is cut diagonally and the other end added to the circumference.

Now I guess some of this is false economy, since wider skirts over the hips would be really useful to me, but since only the calf section of the chemise will be visible under the dress, and extra width at the hem should help me dance better, and well I just can't fit in the size of trapezoids I want, I'll make a non-shirred chemise now, and aim to make a shirred one later in the year.

How the styles look and hang under the same dress, cut to the same plan except the gores should be a great comparison to see.

So here's my planned layout for the chemise:


And here's the pieces I will require:
And how they fit on my fabric:
I'm quite happy with the efficiency of this. The only portion not used is a scrap in the corner next to a piece that had been cut off. If there hadn't been a piece cut off, I would have used this to make my sleeves longer.

A Chemise for the Austrian Dresses - initial planning

The calf length Austrian dresses have revealed a deficiency in my wardrobe - all my chemises have hems that are well above the ankle, but the style requires a floor length chemise. So it's time to make a new chemise.

First I guess I need to analyse the style. Browsing through my posts on Germanic dress, and particularly Austrian dress, and looked at what was visible of the garment below the dress.
All were white or other pale colours likely to be meant to represent undyed or bleached linen. This could be a layer between the chemise (body layer) and the dress, but to me this seems superfluous - chemises were generally linen because this could be washed and bleached more often, with the chemise absorbing sweat and thus protecting the more expensive dress - why would an intermediate layer recreate these characteristics of the chemise? It could be a fashion that evolved out of visible chemises, making them more elaborate mock chemises, and adding areal chemise underneath, but I'm going to use Occam's razor and assume the visible layer is just a chemise.

So the chemise is visible in two places only - the hemline and the sleeves. The sleeves that are visible are quite tight to the forearm, ending at the wrist. Some are smooth, some wrinkled, and a few have a band of trim at the wrist. The hemlines are floor length or just a whisker above, and fall in many folds. No decoration is visible on the hem of the chemise.

My construction plans

This doesn't give many clues to go by, but if we assume that chemises followed the general lines of other garments of the day, particularly albs (which are a kind of clerical undergarment), then we have a couple of cuts that could be used. There is the version with a square body and gussets or there is the body that is slanted to allow sleeves to make self gussets. I choose the earlier version as I'm more accustomed to it.

Sleeves in this model are a long tube from the end of the gusset down. I'll fit the end to the forearm as I have done for earlier versions. I think I may make a modest wrinkle in the sleeves. A long wrinkly sleeve like on my old court chemise can be a little awkward to get in and out of, but I'd like to have a little wrinkling. So perhaps 1m long - halfway between an unwrinkled sleeve and the extent of wrinkles on my previous court chemise. Initially I'll leave the cuff untrimmed, but I may add trim later, especially to reinforce the stress point of the cuff - but I don't want to delay making the chemise to wait for appropriate trim to be made/acquired.

Several albs use methods of pleating in side gores into the body of the garment which creates sudden flaring at the hip. I think this will probably be needed to create enough fullness of the skirts to create the required number of folds. A couple of these albs use a technique called Italian shirring (I am told) to pleat gores into side seams. this creates a lovely pattern with the very small pleats, which should sit fairly flat. "The art of manipulating fabric" says that Italian shirring (shirred Italian smocking) shirring encourages the fabric to fall in very full folds - which is precisely the look I wish to achieve - the skirts on these Austrian chemises are actually quite tight to the body when you look closely, and the closer the chemise sits, the less fabric I require to make lots of folds. I would like to use Italian shirring to pleat in my gores if i have time to do so. I'm still not sure exactly what shape gores that are Italian shirred should be, but I plan to experiment and find out. I'm guessing a trapezoid.

If the side gores don't provide enough folds in the front, then I will add some front gores as well.

Here's how I envision it looking:


And a cutting plan for that:
I'm not yet sure what hte top width of the trapezoid should be - I need to try some test pleating.

Materials and seams
From what material should the garment be made? That's an easy answer - linen. That's what overwhelmingly all the high class undergarments are made of. I've got some mystery fabric that I think is linen, and I've had such trouble finding assured linen cheap that I'm desperate enough to use the "probably linen" fabric.

Thread? Again linen, for the same reasons, as well as practical one - wool is too weak and will snap, and silk too strong and will often snap the threads in the linen fabric (no the same does not apply to embroidery, where the fabric isn't under stress). I've some lace making thread, in 60/2 size, which has done nicely on previous chemises, and will do nicely on this one.

Finally seams. There is one technique which is used very commonly on linen textiles in the medieval period - the run and fell seam. It is much more common than other techniques, and for good reason - it is tough, easy, requires a smaller seam allowance, and is quick to sew by hand. Why would I want to use anything else?

So I guess it's time to wash and cut some fabric!


Tuesday, 30 September 2008

Aachen Cathedral Treasury - Part 3: Shrine with nice pictures (tents!)

Following on from my previous posts concerning the Aachen Cathedral Treasury, here is another selected treasure.

Karlschrein

Karlsschrein (Charlemange shrine)- 1200-1215 Aachen , gilded silver and enameled copper.

This is a lovely piece of artistry. I read somewhere that 12th C german metalsmiths were copied by the manuscript artists because they were were considered the superior artists of the time. For a colour pictures of the shrine, a glimpse of colour scheme, search for 'Aachen' at this link, and look for the gold and silver metalwork. (sorry direct links not working) It's only a single colour image of the shrine, but it shows well how the colours are and how a few more details can be seen in colour (eg broaches clasping cloaks) than can be seen in the high resolution black and white photos linked to below. Ithink it might have been all gold originally, but the gilding wore off.

Now to talk about specific aspects of the shrine's artwork and how it relates to concrete objects of the era....

clothing
The clothing depicted on the shrine is mainly same as 1180, possibly with less droopy sleeves, although with so few women depicted, and then mainly only Mary, it is hard to tell with regards to sleeves.. Are silversmiths behind or conservative, or does fashion not feature the sudden changes seen in France at around 1200? I think it may be rather the characters on the shrine - saints are very often dressed conservatively in fashions a little out of date and lacking the excesses of fashion. But it's also possible German fashion doesn't have a big change from late 12th C to 13th C clothing -this would be a lovely project for someone else to follow up.

There are some really lovely depictions of braids on garments, and the ample stones reflect a period practice we mostly only read about, since extant garments generally have had these stolen, and in manuscripts we can't reliably distinguish these from braid with a blobby pattern.

shoes
The material and method used enables us to see a number of features not normally seen - for example crisp lines of applied braid on many of these shoes (almost in the same pattern as the extant shoes of Philip of Swabia of around this time). Manuscripts cannot show the difference between an applied raised braid and a flatter painted on sewn on decoration in this situation, while much sculpture has been weathered, obliterating the crisp lines that make such a distinction possible. The precious and religious nature of this shrine has resulted in excellent preservation.

About half the shoes are in this style with
Many others saints on this shrine have one piece of braid (less high, often wider), running up the vamp of the shoes and far up the calf - these are long boots, and remind me of this pair of hose/buskins.

accesories
The crowns shown match well with the extant crowns of this era (mostly german) that I have seen, especially the fleur-de-lis on top.

armour
There are a couple of nice pictures of armour, including details of Charlemagne putting on (or taking off?) his armour. The lines of where the chainmail stops (especially on the legs) are clearer than on many other pictures I've seen. And nice details of surcoats, haulberks without a concealing surcoat, and haulberks with built in hoods (I think).

tents
There are a lovely picture of tents from a fairly close perspective , and a second depiction with similar tents with an interesting feature I'll discuss at the end. I'm quite excited because tents are relatively rare in artwork of this era, and pictures with this level of detail even more so. They appear to be single bell tents, held up by a central pole and a network of guy ropes. The Central Pole is not visible, but I believe it is implied by the use of a ball and decorative caps on top of the centre of the tent. Charlemangne's tent is topped with the eagle (symbol of German royals), while the other tents are topped with crosses.

The section of tent immediately under the ball appears to be a separate piece from the tent roof below it, as clear seams (including textural differences) show on several tents but is probably still a fabric (cloth or leather) as it falls in a curve with gravity, rather than stiffly. This corresponds with stiffener panels used in recreations.

The roof of the tents appears to have been decorated with patterned fabric. Other tents show a pattern of radiating stripes that could be stripes (more accurately arcs), or could simply be tension lines from the guy ropes.

From the edge of the roof, several guy ropes are seen anchored to the ground. They attach to the roof of the tent via a triangular or y-shaped feature. The spacing between guy ropes is quite small, although guy ropes on the front of hte tent have been omitted. This may be to create a doorway, but more likely is for artistic reasons, to not block the view of the protagonists. (other guy ropes end at the edge of the tent to prevent overlapping other characters).

The walls of the tent descend from somewhere slightly inside of the edge of the roof, and descend fairly vertical until about halfway down, and then flare out to the ground. The way the walls flare is consistent with being pegged out (approx one peg per guy rope, so also at fairly regular intervals). I believe I can see a one of these pegs, but it is simply a tapered blob.

It is not clear if any additional structures such as internal wall poles are present or absent, but if the lines on the roof are stress lines, I would guess not.

A doorway opens from the front of the tent in a gentle curve, but the way this nicely frames the scene inside makes me believe this is likely to be an artistic cutaway, rather than a realistic doorway shape. Then again, it might be both a good artistic cutaway shape and a good door way shape.

On the second picture, one tent is depicted with a strange window in the roof. Maybe this is a skylight? Interestingly, the lines I previously identified as tension lines in the roof run through the "window" in the roof from centre pole to guy ropes. Perhaps this is a way the roof was reinforced?

This reminds me a great deal of the tents used by my sca neighbours.

other items
Also depicted on the reliquary are some nice lamps and pennons, which I've added to my forthcoming next post on the topic.