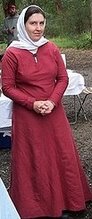
So today's article is derived from years of telling collegians that they can be warm, dry and medieval cheaply and in a medieval way. But I think these tips are of far wider usefulness, so I share them here today.
Why wool?
Wool is a good insulator, keeping you warmer than other plant based materials (cotton, linen, ramie) or synthetic materials. Wool will also keep you warmer even when wet, and as a bonus it is also fire retardant. More of the wonderful properties of wool and the reasons behind them are explained in an article by Ásfríðr Ulfvíðardóttir in the newest edition of the Known World Handbook. Wool was the medieval fabric of choice for outerwear for good reason because of all of these properties.
If you are allergic to wool, it may be worth investigating other protein based fibres, as these are likely to be warm for similar reasons - cashmere from goat or rabbit (beware many things labelled cashmere may actually be wool), alpaca fibre, or more exotic fibres such as camel or dog. Silk as a sort of protein fibre (moth cocoons) is definitely warmer than plant fibres. If it was spinnable and collectable, it generally was spun and used for something in medieval times - there are a few examples of exotic fibres such as camel and goat in extant artifacts.
Why an old blanket?
Blankets are a cheap source of sufficient quantities of thick wool to keep you warm. Blankets are generally sturdy, thick, warm, large, and often prepared in ways that resist fraying, all of which are great attributes in medieval outerwear. Single bed and double bed blankets are large enough to make a wide variety of covering garments. Old blankets are great because they are relatively cheap and you won't be worried about dragging it on the ground, poking holes in it, having sparks burn small holes in it, or chopping it up. Old wool blankets are also relatively easily to obtain: See your local op/thrift/secondhand shop for cheap blankets - look for plain colours that aren't fluorescent. In Melbourne, expect to pay $10-$20 per blanket (expect to work around some holes at the cheapest end of the range), and we aware that the salvos have a better range, but rarely have the best bargains.
What are the 10 ways you speak of?
These methods of using an old blanket are presented in rough order of increasing sewing skills required to utilise them.
1) Put it on your bed
Medieval peasants weren't silly. Going to bed when it gets dark also means you are in your bed in the coldest part of the night, conserving your warmth in a cocoon of bedding rather than expending energy to stay warm. Wool blankets are good bedding for all the reasons presented above. Down is too, but synthetics seldom are as good. It's important to note that wool takes a few moments to warm up - your body heat warms it up - use a heated object to heat your bed (brick in a towel or hot water bottle, or another person) or go to bed before you get cold to best utilise the insulating properties of your wool.
This trick can also be used after you turn your woolen blanket into garments - they can be piled on your bed to keep you warm too. This also saves a lot of storage space for bulky garments.
2) Put it over your bed
Old 4 poster beds were a very sensible invention - even as you breathe or lie still you loose a lot of heat. Enclosing the space around your bed not only prevents drafts, but will eventually warm up as you breathe into it. Using an good insulator such a wool to enclose the space will mean you loose less of the heat than you would with other materials. Bed hangings don't have to be elaborate - they can just be cloth draped from a point (think mosquito net) or a blanket draped over a rail.
3) Pop it on your lap
I get coldest when sitting still. Keep a small blanket on your chair to drape over your lap when immobile, and leaving it on your chair when doing things allows a method of quick and easy temperature regulation. I find a draped blanket much easier to deploy than putting on and off extra layers of clothing.
4) Wrap it around you
I'm not joking, I utilise this often when I am doing fairly sedentary activities.
My favourite way to wrap my wool blanket (for me a right hander) is thuswise: start by tucking an end under your lowered left arm, and hold it in place my clamping upper arm tightly to your side. Wrap the rest of the blanket across your front, under your right arm, across the back. Gradually slant the blanket upwards as you cross the back, and end by draping the remaining blanket over your left shoulder and sort of gather any excess fabric up draped over your left arm. Your blanket needs to be cut to a width of armpit to above floor and length I'd say less than twice you hip measurement. A wider blanket can have the top edge folded inwards to the deired dimension before you start wrapping, and a much longer blanket might wrap around the body twice.
This wrapping leaves my left arm fairly immobile (with practise you can do simple tasks with the lower arm without moving the upper arm), but your dominant right arm free to do stuff. It's not suited to active pursuits, but you can do a surprising number of things that you might do at night in this wrap - walk talk, drink, sing, etc.
Other ways of wrapping a blanket also exist, but I can't personally attest to them. There are many pictures of medieval people wearing draperies, however it's difficult to tell how many are simply archaic images of biblical figures and how many are realistic depictions, but this can work.
If it drizzles or gets colder, reach behind your neck and pull the fabric over your head, and you will have a rudimentary hood. It's better than nothing, but it does tend to fall down.
5) Pin it closed as a cloak
It is generally stated that anglo-saxon cloaks were rectangular. personally I think many of the artwork examples people use from late in the period actually show semi circular cloaks, but I think something as useful and simple as the rectangular cloak would have existed earlier in the period. Anyway, its a really simple way to fasten a cloak.
Simply pin two corners of the cloak together and then put your head through the hole created. rearrange the pin to over your right shoulder if you are fighting or doing a lot of stuff with your right arm only, or to centre front otherwise so you can use both arms.
If you are a early period Scandinavian noblewoman, you might consider wearing your rectangular or square piece of fabric as a shawl too.
6) Poncho
One quite conjectural methods of making a cloak is to start with a square and cut a hole in the centre of it and wear it as a poncho. This comes quite close to some period illustrations in all but the finer details. It's so beautifully simple with so little sewing, I just had to mention this as an option.
7) Half circle cloak
One of the most popular varieties of shaped cloaks was the half circle cloak. Versions of this cloak exist from pre-medieval to post Renaissance periods. As the name suggests, the cloak is simply the shape of half a circle, occasionally adding some difference in cutting at the collar, and varying greatly in length depending upon time, place, gender, rank and use.
To make a simple half circle cloak, simply cut out the shape of a half circle to your desired length. I suggest looking at pictures of your desired time period to determine this, although you could choose based on warmth vs practicality or based on the length of your fabric. If you are lucky, or your blanket very large (or you very small), your half circle may fit within your blanket. Otherwise you may be able to cut two 1/4 circles from diagonally opposite corners of the blanket and sew them together to make a half circle. For even narrower but long fabric, a cutting pattern method based on strips of fabric may be used, but this tends to be more useful for fabric on the bolt than blankets.
Pin or fasten with clips or strings your half circle cloak over the right should or at the bust, and it should work well for you.
8) A hood
You loose a lot of heat through your head. Once you have a cloak, often a second cloak will not make a big difference to warmth, but a hood will keep those bits of you which aren't covered by the cloak warm. And what better than nice warm water resistant blanket fabric to make your hood from. Many patterns are available to assist with this.
9) A chape
A chape is a 12th century term for a hooded cloak. My interpretation of a 12th century version of this is to make a hood which instead of stopping at your shoulders, continues flaring outwards until it's desired length. I find this a very practical garment, great at keeping the rain off me.
10) A nice thick tunic
Most medieval tunics would have been made of wool. However big bulky woolen tunics can be awkward for everyday life. But I find them invaluable to slip on over another woolen tunic when it gets cold. Bulky a tunic made from a blanket may be, but it can be a lot less awkward than a cloak which drops in your food, slips into your water and makes it awkward to carry things, as well as slipping open and letting a breeze in.
I can make a simple small women's dress from a single bed blanket, a short men's tunic, no matter how broad, should also be achievable. I expect very few people would be unable to make a simple tunic garment from a double bed blanket.
In some time periods tunics can also be hooded and/or have removable sleeves (see for example gardecorps) or can have sleeves that drape over your hands, all of which are great ways of keeping you even warmer than a standard tunic.
11) Hose
Just because you kept reading, I've added a bonus 11th use. If you find a particularly thin blanket, you can chop it up to make hose (medieval stockings). You loose heat from all over your body, so hose can be more useful in keeping you warm than a third cloak as they cover a part of you that wasn't well insulated. Many patterns for various medieval hose are available. Similarly, fabric mittens, hoods and a variety of other accessories should be achievable with scraps of your woolen fabric.